A tutorial on how to install an Operating System in VirtualBox. This is my first article on VirtualBox and I’ll describe the steps involved in creating a Virtual Machine, mounting the ISO file of your Operating System, booting from it and starting the installation. From then on installation of OS will be the same as doing the same on a physical machine. VirtualBox is free to download from http://www.virtualbox.org/wiki/Downloads. After installing VirtualBox follow the steps below. “Guest” OS refers to the operating system which is to be installed inside a virtual machine whereas “host” OS is the operating system installed on the physical machine.
Step1: Create a Virtual Machine
First job is to create a virtual machine, to do so open VirtualBox and click “New” from the toolbar.

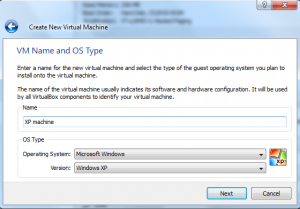
Enter any name for your Virtual Machine and select the Operating System you’re going to use as your GUEST OS.
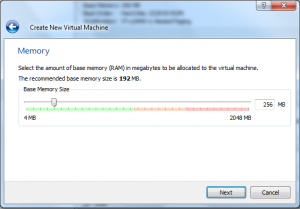
Select the RAM size to be allocated to your guest OS, choose this wisely it should be equal to or more than the minimum system requirement of your guest OS at the same time if it goes more than 50% of your physical machine’s RAM it’ll slow down your host OS.
You need to create a Virtual Hard disk for your Virtual Machine, this is just a file with a .vdi extension which will contain all files stored inside that virtual machine. Choose a size suited for your guest OS and select the “Dynamically expanding disk” if you want to save disk creation time and file size. If you choose “Fixed size disk” it will take up the entire size specified but the performance of your Virtual Machine will be better. After clicking finish move on to the next step.
Step 2: Change the boot order of the VM
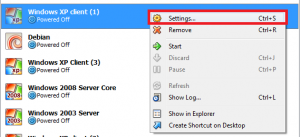
Right click the newly created Virtual machine and go to settings.
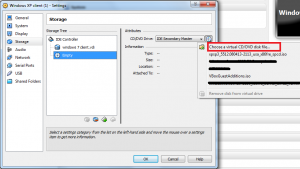
Select storage from the left side list, select the CD icon and from the right select “Choose a virtual CD/DVD disk file”, navigate to the ISO image file of the OS on your computer. Now the OS image is mounted to your Virtual machine.
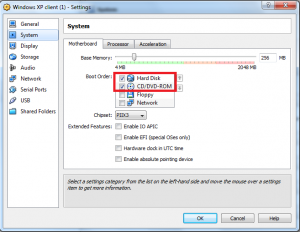
To change the boot device order of your virtual machine go to the “System” option from the left side list, select Hard Disk and click the up arrow to bring it to the top of the list. Make the CD/DVD-ROM the second device and uncheck the other devices.
Step 3:- Start the Virtual machine
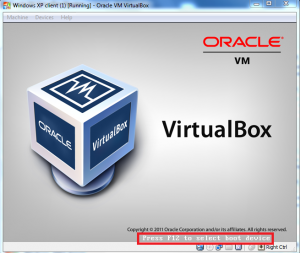
To start the virtual machine double-click the VM, a window opens here you can press F12 if you want to select a device of your choice to boot.
To boot from the CD-ROM press c.
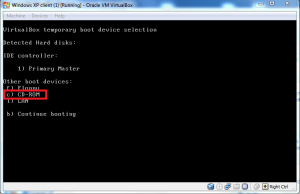
Your VM will now boot from your Operating System image file and the OS installation will start as usual.
Some important shortcuts
The following keyboard shortcuts can be used inside the VM to perform certain actions that might canflict with your physical machine
[Right Ctrl] + Del – Equivalent to pressing [ctrl] + [alt] + [delete] inside the Virtual Machine. If you press ctrl+alt+del the physical machine will also be affected.
[Right Ctrl] + H – (Halt) Equivalent to pressing the power button on the physical machine.
[Right Ctrl] + R – (Reset) Equivalent to pressing the reset button, will reset your virtual machine.
[Right CTRL] + F – (Fullscreen) Toggles fullscreen
