
The Windows Server 2019 Install Procedure
The following steps walk through Windows Server 2019 Installation from media. Aside from the text fields and the license prompt in step 3, installing Hyper-V Server does not change the screens or process.
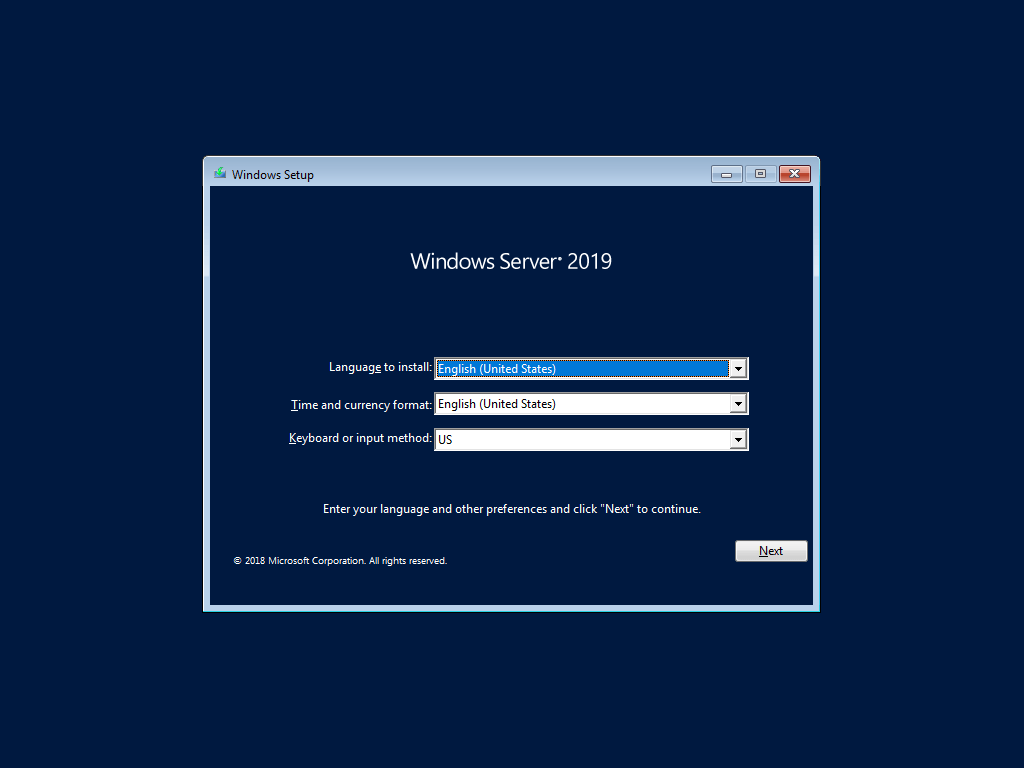
- You begin on the language, locale, and input choice screen:
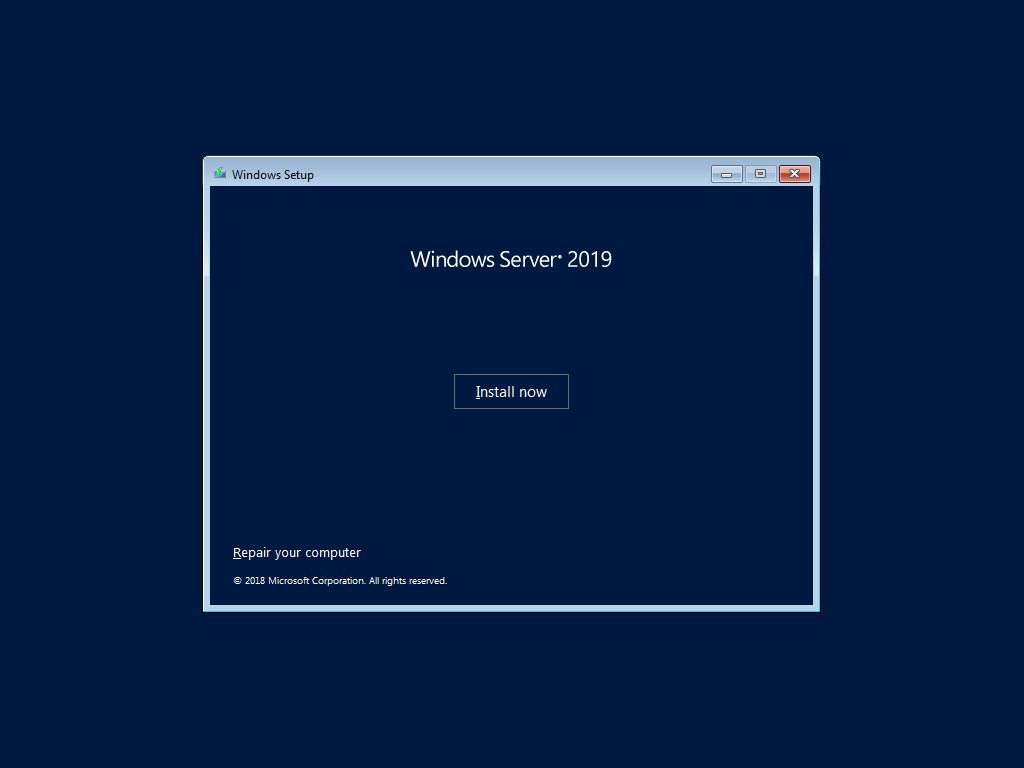
- The second screen has the lone Install now button. If you need it, you’ll find the Repair your computer link at the lower left.
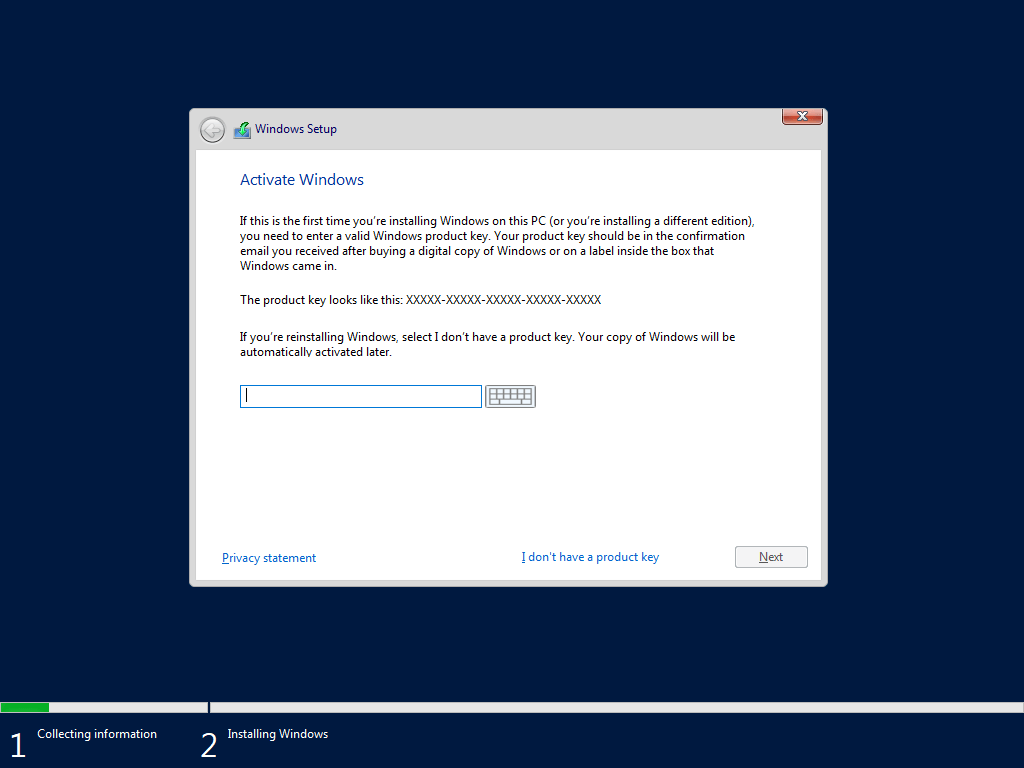
- For most installation modes, the wizard will prompt you for an activation key. You can select I don’t have a product key to enter a key later.
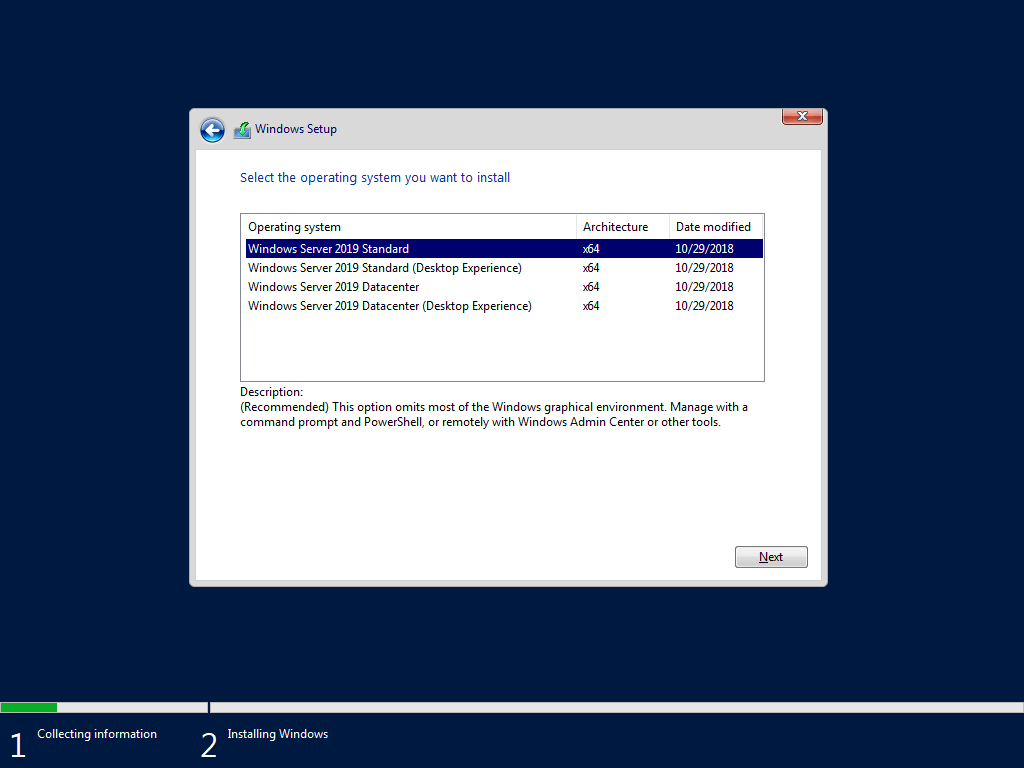
- Next you will choose the edition and install mode. The available options, and even whether or not this screen even appears, will vary based on your media. The default option will install server in core mode. “Desktop Experience” include the full Windows Server GUI.
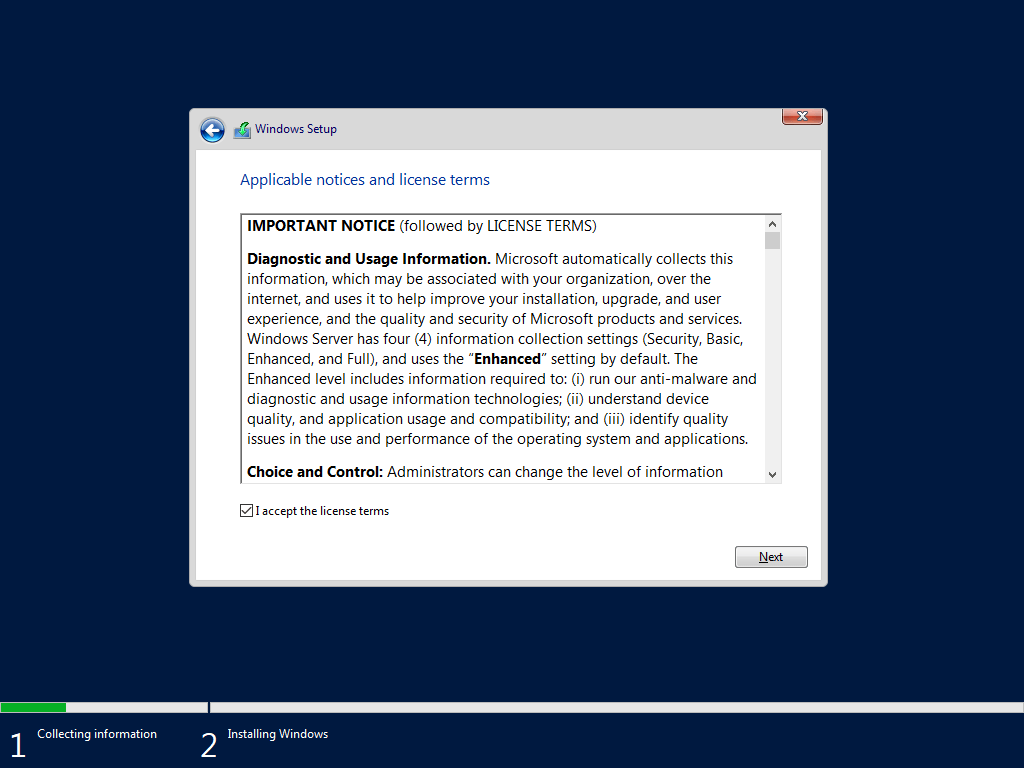
- You must accept the license terms to move on.
- Choose the disk to install on. You can use the toolbar underneath the list of disks to control where to install. If you’d like to partition a volume rather than use an entire disk, click the New button and enter the desired size. Use the Load Driver button if your disk does not appear and you have driver files from the manufacturer.

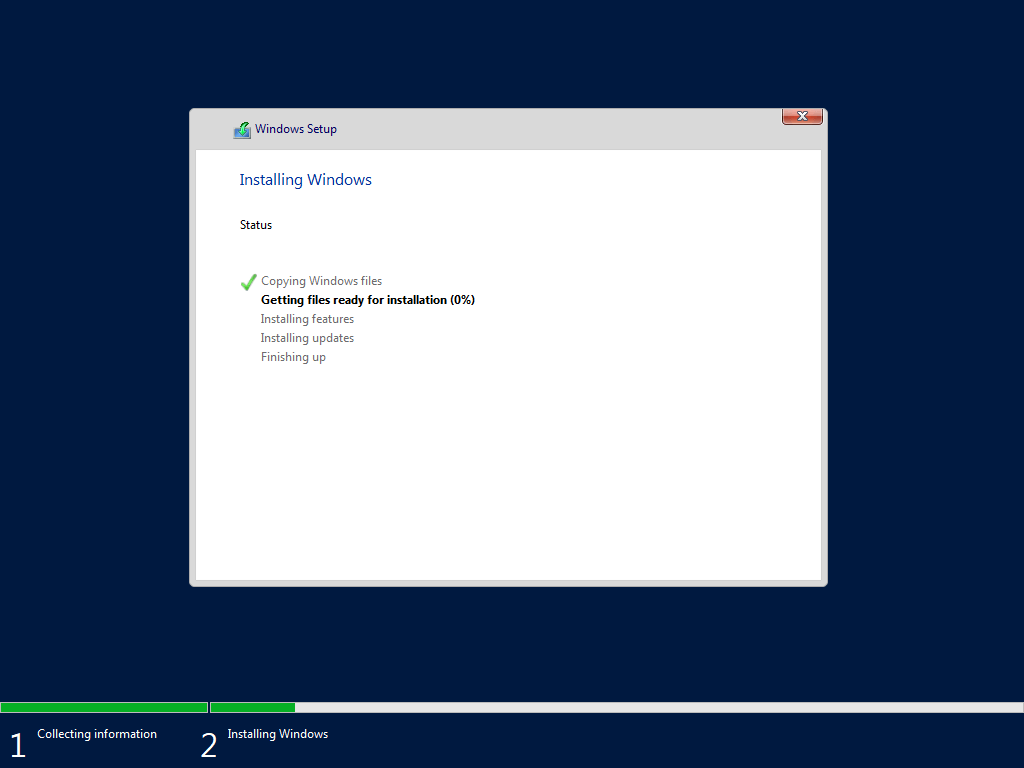
- The wizard will transfer and expand the image files for your selected edition and install mode.
This completes the installation portion. Next, you configure your Windows and Hyper-V installation. How you do that depends on the installation mode that you chose. I will show them separately.
Configuring a New Windows Server 2019 Core Installation
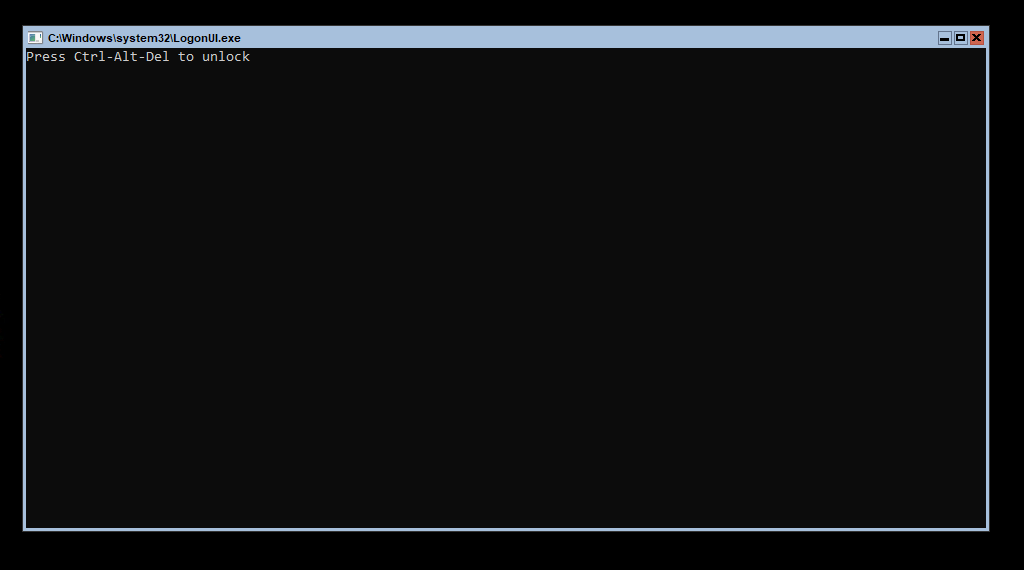
If you chose to install Windows Server in core mode, then you will begin with the standard text-based unlock screen. We begin there.
- Enter the Ctrl+Alt+Del key sequence:
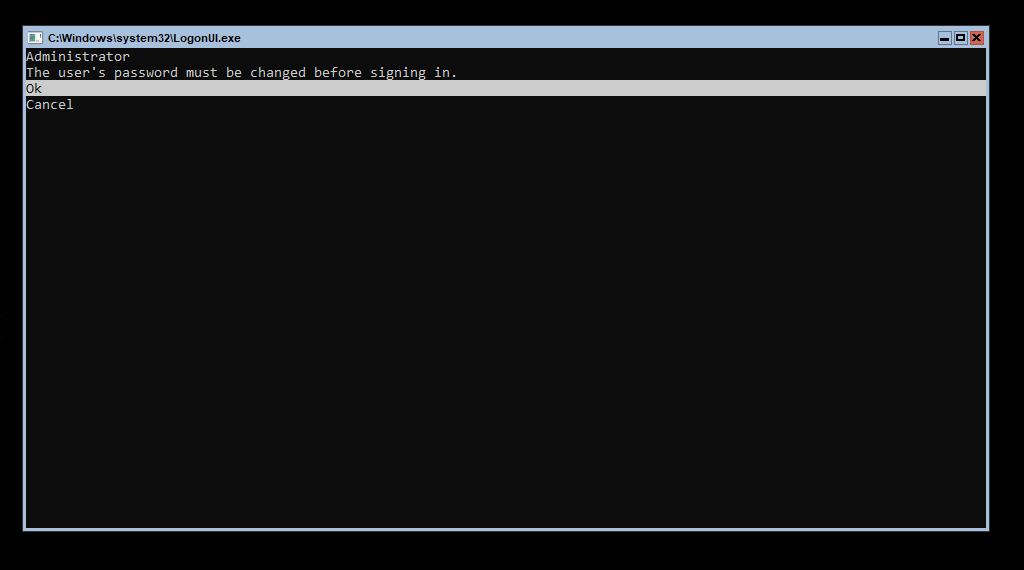
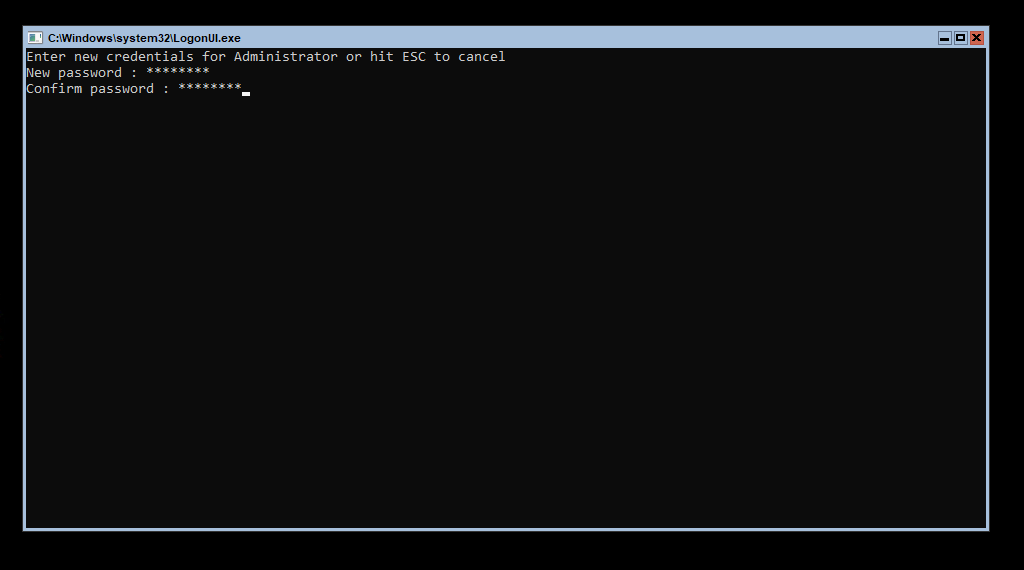
- Windows will prompt you to change the local administrator password. Press Enter:
- Enter and confirm your new password. Use Tab to move between fields. Use Enter when finished:
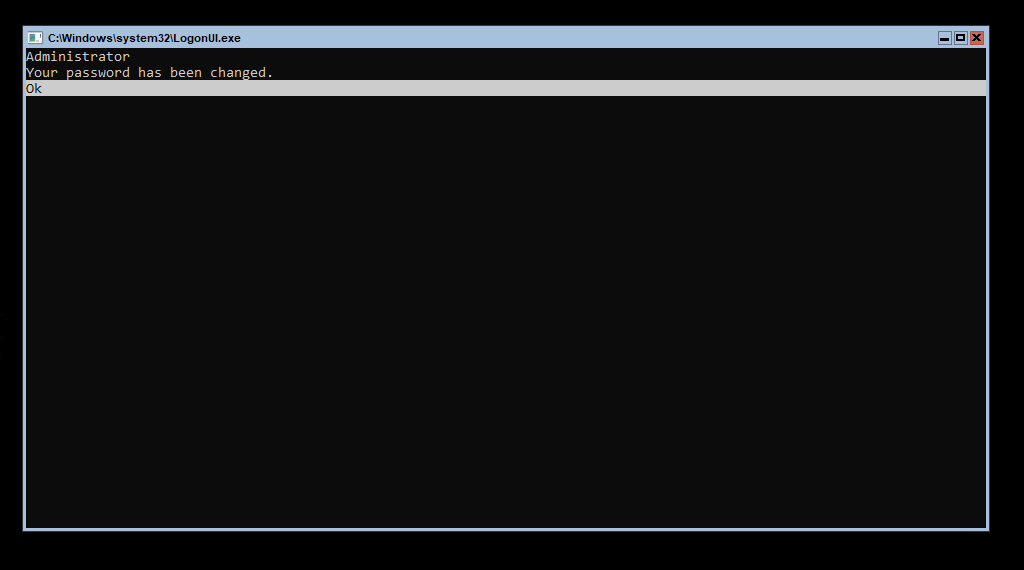
- After a brief, perhaps imperceptible delay, you will receive confirmation that your password was changed:
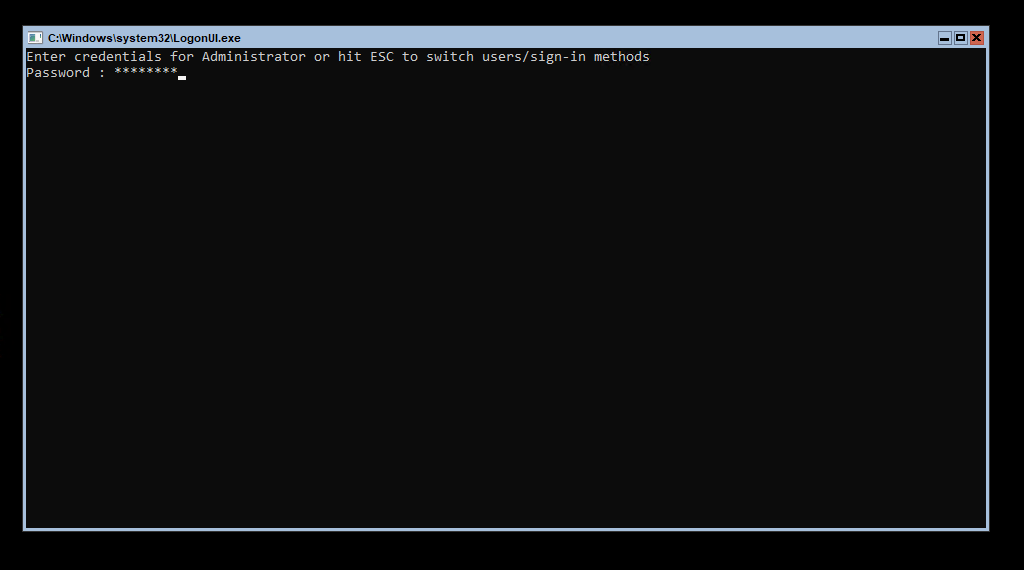
- From now on, you will see the standard Ctrl+Alt+Del and password challenges:
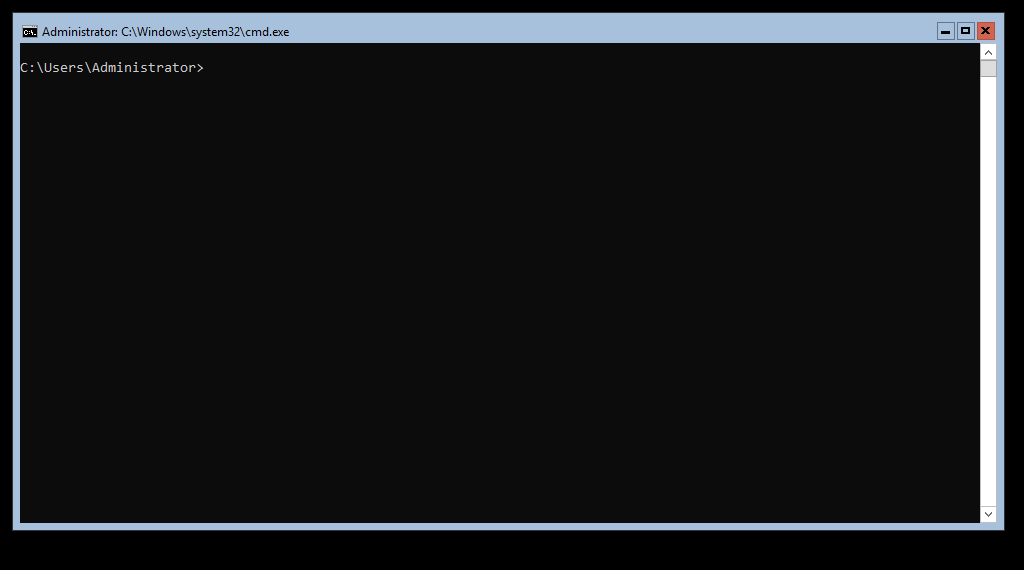
- In the default configuration, Windows will take you to a standard command prompt:
You have multiple choices on how you proceed from here. I recommend that you do not install Hyper-V until you go through a number of other steps first. To complete the section on Core mode, I will list a few options most helpful in this case. After the graphical startup walk-through, I will give you my recommended checklist. Then I will present Hyper-V installation steps.
Windows Server Core and Hyper-V Server Configuration Options
Windows Server Core (and Hyper-V Server) looks intimidating to those that have always used Windows’ graphical environment, but I strongly encourage you to stand up to the challenge. Command-line functionality greatly exceeds anything that you can accomplish with a mouse. But, if you’ve never done it before, then you might not even know where to start. You have a plethora of options:
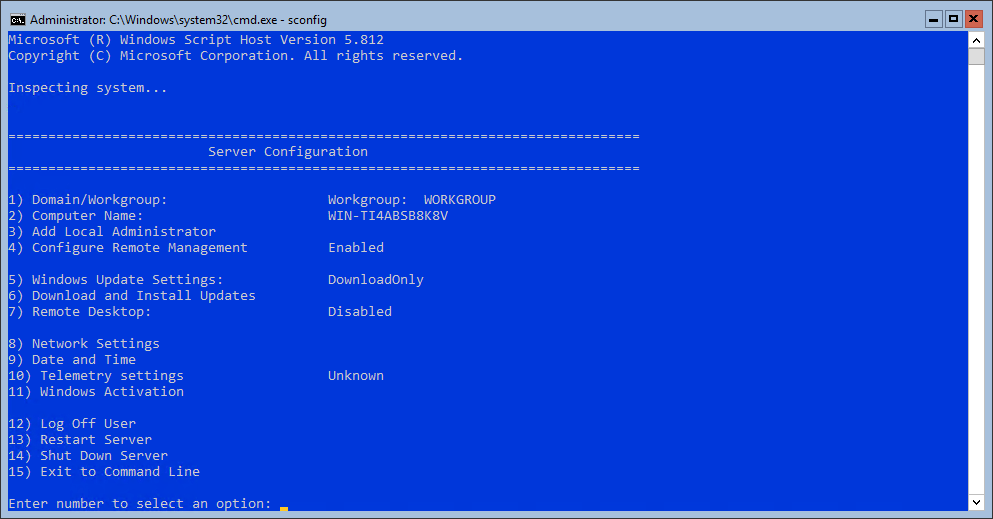
- sconfig.cmd: Microsoft has deprecated this tool and it might eventually disappear from Windows Server releases. However, you still have it in Windows Server 2019. It’s as good a place to start as any. Just type sconfig and press Enter. You’ll get the following screen:
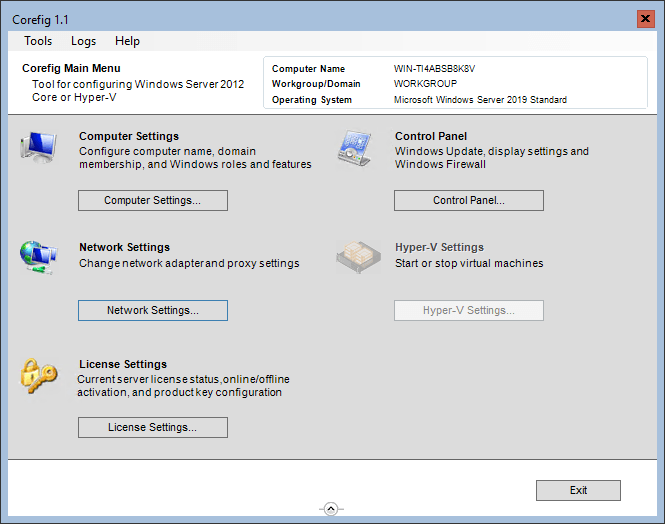
- Corefig: I’ve maintained the Corefig project for a few years now, although I have not done much for updating. I am in the process of building up an all-new version 2. For now, version 1.3 works on WS2019 about as well as it worked on 2016.
- PowerShell: One tool that can solve all of your problems. You just need to know how to use it. I suggest simply using your favorite Internet search engine to look for “powershell <whatever task>”. You have choices besides interactive mode, though. I like to build up pre-defined scripts for my hosts, such as this one.
The above list focuses on interactive tools. With more up-front effort, you can deploy and configure systems in minutes. Tools include Windows Deployment Services, System Center Virtual Machine Manager, Desired State Configuration, and others.
The next section shows the initial post-install configuration as above, but for a GUI installation. Skip over that section and continue with the vital configuration checklist.
Configuring a New Windows Server 2019 GUI Installation
Note that Hyper-V Server does not have a graphical option, so these instructions will not apply to that product.
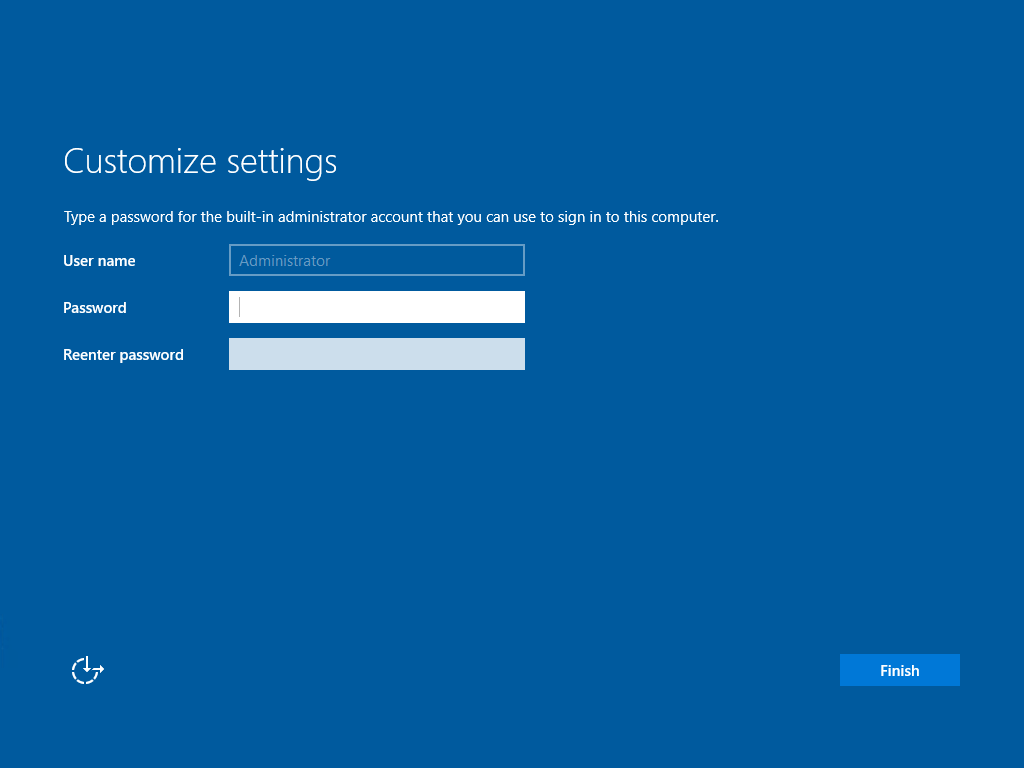
If you chose to install Windows Server in graphical mode, then you will begin with a prompt to change the local administrator’s. Enter and confirm your desired password.
After that, Windows Server will take you to the standard lock screen, which has not changed since 2016:

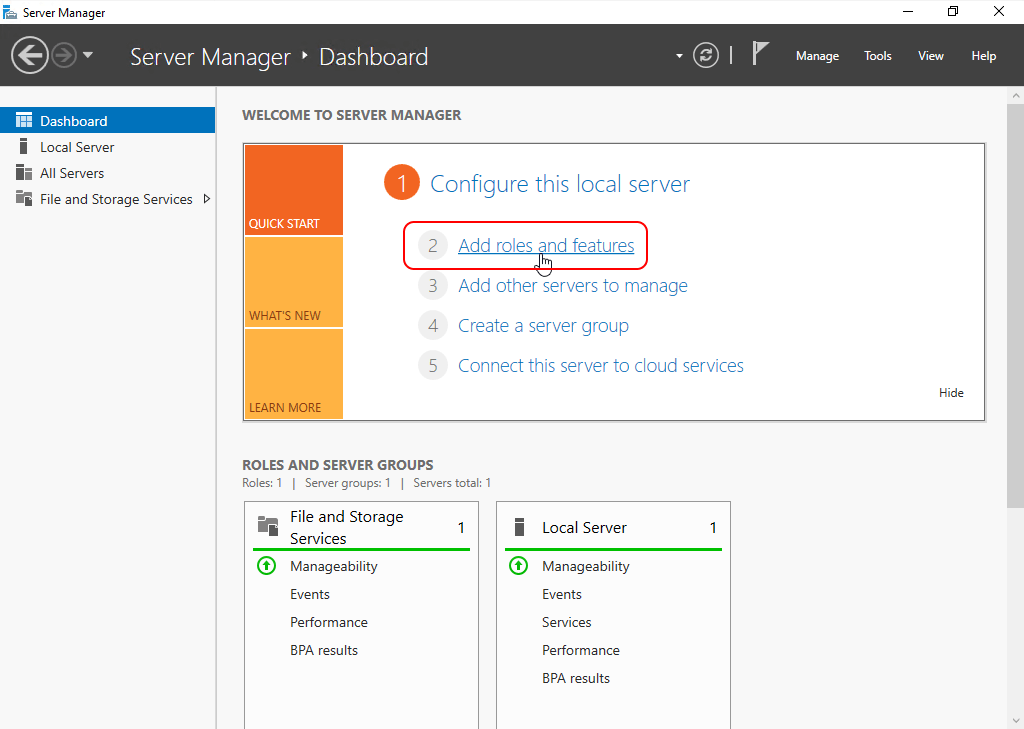
When you log in, Server Manager will open automatically, as it always has. It will also encourage you to install Windows Admin Center.
I assume that most people choose to use the full GUI installation for familiarity reasons. Therefore, I classify the initial configuration of Windows Server GUI mode under “common knowledge” and will not give any further information on that. If you are new to Windows Server and don’t know how to do these things, I don’t recommend starting with a Hyper-V installation.
Hyper-V Pre-Installation Checklist
Perform these steps on your newly-installed Windows Server 2019 deployment prior to installing Hyper-V.
- Update device drivers
- Install vendor-supplied system management utilities
- Configure basic networking — delay if you will use a fully-converged design
- Update Windows Server — you might need to temporarily configure basic networking to make that possible
- Rename the computer
- Join to the domain. No, your workgroup mode is not as secure, and no, you’re not solving any problems by avoiding domain membership. You can skip this, of course, but I don’t provide any guidance on such builds. I figure that if you intentionally ask for the unsecured micro-management nightmare of a workgroup build, then I would disrespect your wishes if I helped you.
- Figure out how you want your Hyper-V networking to look.
Installing Hyper-V on Windows Server 2019
With the preliminary work out of the way. You can install Hyper-V on Windows Server in three ways: PowerShell, dism.exe, and Server Manager. I listed those in my preferred order.
Note: Regardless of installation method, your host will reboot twice to enable Hyper-V.
Install Hyper-V with PowerShell
PowerShell is the fastest and easiest way to install Hyper-V. It works on Core and GUI equally well. Just remember to start PowerShell in an elevated prompt if using a GUI-mode install.
Install-WindowsFeature -Name Hyper-V -IncludeManagementTools -Restart
Install Hyper-V with DISM
You have to type a bit more to get DISM to work, but you can run it from the standard elevated command prompt:
dism /Online /Enable-Feature /FeatureName:Microsoft-Hyper-V /All
Once this command completes, it will ask if you want to restart the computer.
Install Hyper-V from Server Manager
The Server Manager technique is, by far, the longest, most painful, and most confusing. I recommend that you choose either of the other two.
Most people that use Server Manager modify the local system. You can connect to a remote system from Server Manager’s home page. You can then pick it instead of the local system at the correct point.
- On the home page, click Add roles and features:
- Click Next on the introductory screen.
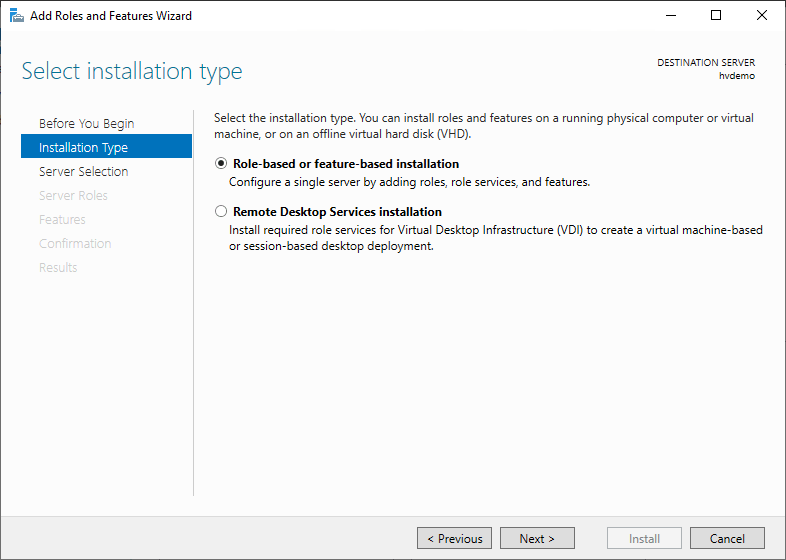
- Choose Role-based or feature-based installation.
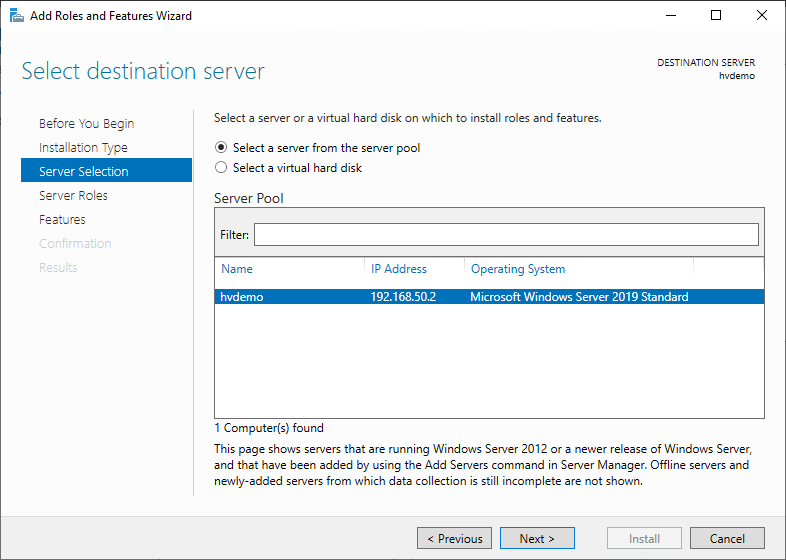
- If you do nothing on the Select destination server screen, you will change roles on the local server. If you added a remote server prior to starting the wizard, you can modify roles there. Choose the desired system and click Next.
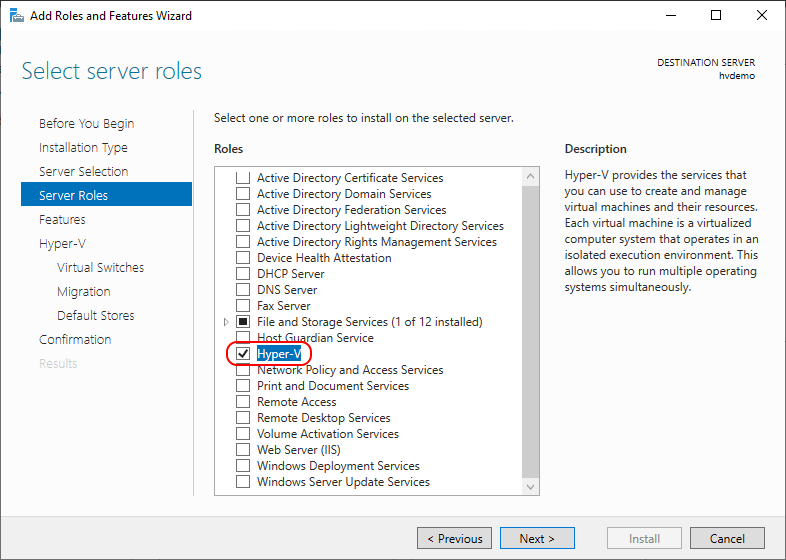
- Check the Hyper-V role.
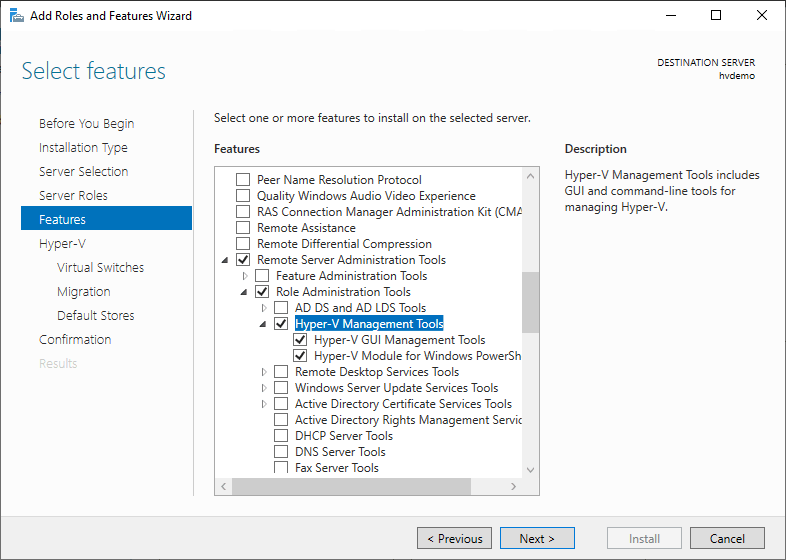
- When prompted, you can add the management tools as well. You do not need to do so. If you prefer, you can Cancel here and select individual management components on the next screen.

- On the Features page, you can pick a different selection of management tools, if you wish.
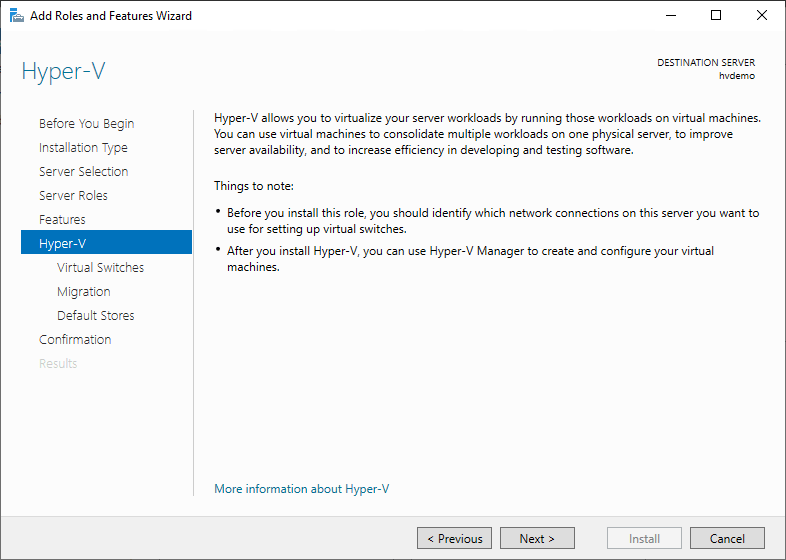
- You will get an introductory screen specific to Hyper-V. It talks about some of the same things we went over in the the pre-installation checklist above.
- You can now pick a physical Ethernet adapter to host a Hyper-V virtual switch. I highly recommend that you skip this page unless you want only defaults. You can set up networking later.

- You can choose the initial Live Migration security control. The settings shown only apply to Shared Nothing Live Migration, not clustered Live Migrations. I prefer Kerberos because of the security and the ease of initiating migrations. You can always change this option later.

- Here, you can change the default storage location for virtual machines and virtual hard disks. As with the other settings, you can change these later.

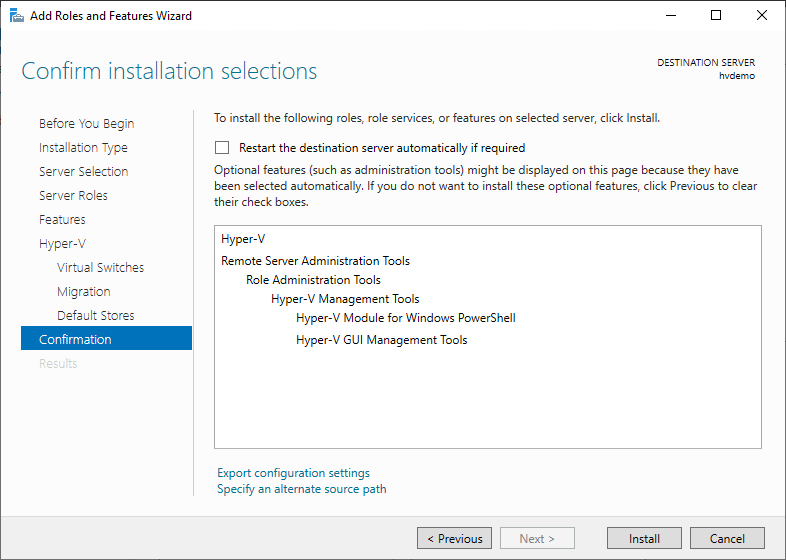
- The final screen allows you to review the basic options that you chose and optionally export them. It also allows you to enable an automatic reboot to enable Hyper-V. Click Install when ready.
Once all the reboots have completed, you’re ready to start creating and running virtual machines.
Hyper-V Post-Installation Checklist
Hyper-V in Windows Server 2019 continues the established tradition of needing very little post-install configuration. I’ve listed the options that typically draw the most interest:
- Networking
- Create any desired teams
- Create one virtual switch
- As an alternative to the above two steps, create a switch-embedded team
- Host configuration options — use Set-VMHost or Hyper-V Manager
- Default virtual machine configuration storage location
- Default virtual machine virtual disk storage location
- Live Migration security settings (for non-cluster migrations only)
- Live Migration performance settings
I recommend that you take a look through the activities available to you. Most cannot be set in the GUI. Start your discovery in PowerShell:
Get-Command -Module Hyper-V