Automating infrastructure setup in Azure Cloud using Terraform and Azure DevOps is a powerful approach to managing your infrastructure as code (IaC). This allows you to define and manage your Azure resources programmatically, version control your infrastructure configurations, and automate the deployment process.
We will be creating a Java based WebApp(app service) in Azure cloud using Terraform and automate the process using Azure Devops Pipelines.

Pre-requisites:
- Azure subscription
- Azure DevOps organization and project
- Terraform Build & Release Tasks extension in Azure DevOps
- Terraform files created and stored in SCM for creating resources in Azure cloud
Implementation Steps:
- Create a resource group first in Azure cloud
- Create storage account, container for Terraform to store state information in Azure cloud remotely.
- Create pipeline and add Terraform tasks
- Execute pipeline to deploy resources(App service plan and WebApp) in Azure cloud
- Verify resources are created in Azure cloud
- Confirm if the terraform.tfstate file is updated
Create Resource Group in Azure cloud
Login to Azure portal, Create a new RG, or you can skip this step if you already have existing group.
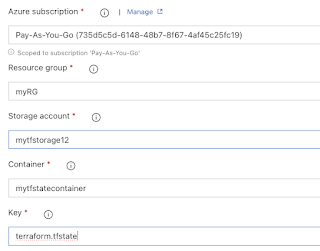
Create Storage Account in Azure cloud
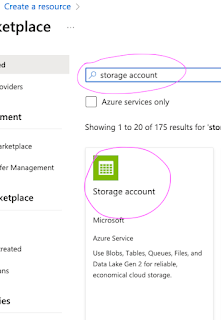
Create a new resource, type storage account
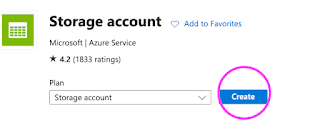
Click on create
select RG, enter unique account name, select standard as performance, select locally redundant storage
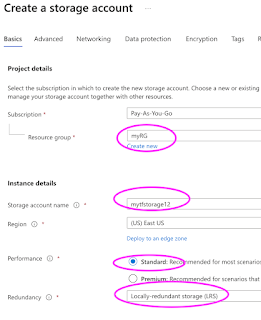
Click on create
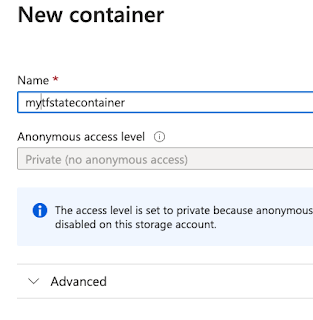
Create a container inside the storage account
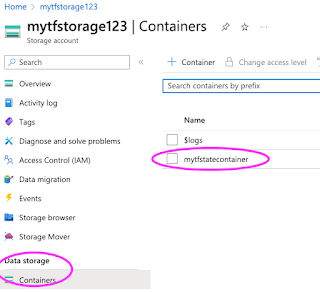
Select the storage account you just created, click on containers under Data storage
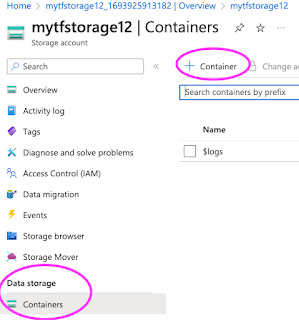
enter a name for the container
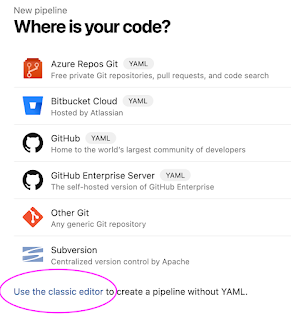
Create a pipeline in Azure DevOps
Login to Azure Devops, select Pipelines, select use the classic editor to create a pipeline
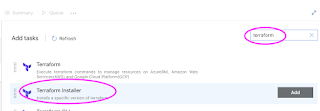
Configure Pipeline with tasks
Add Terraform installer task to install Terraform on build agent
Add Terraform task

Configure the task
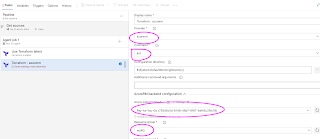
enter storage account, container, key information as below:
Add terraform tasks to plan, apply
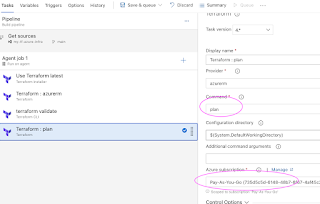
Add Terraform task for plan
change the command to plan from drop down and also select azure subscription from drop down
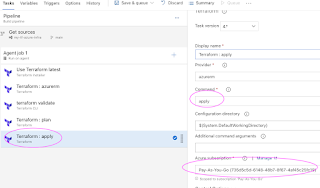
Add Terraform task for apply
change the command to apply from drop down and also select azure subscription from drop down
Now verify to make sure if we have correct values in each/every task. Now click on Save + Queue.
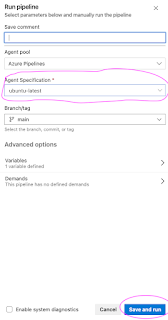
Click on Save and Run

This confirms that pipeline have successfully created resources in Azure cloud. You can login to Azure portal to see the resources – app service plan and web app.

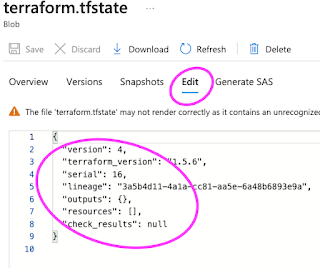
You can also verify terraform state info which has resources entry for all the resources created
Click on Containers, mytfstatecontainer
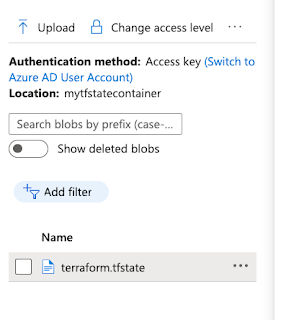
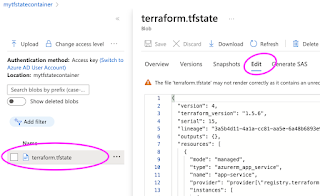
Click on terraform.tfstate
Click on Edit to view the content of terraform state file
Clean up resources created in Azure using the pipeline – destroy command
change the command to destroy instead of apply from the drop down
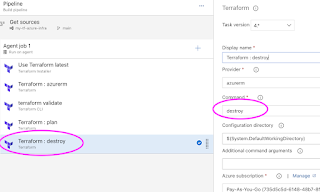
You can either add a new task for destroy or modify to destroy from apply in the existing task.
Now save the pipeline and run the pipeline. check the output of destroy task
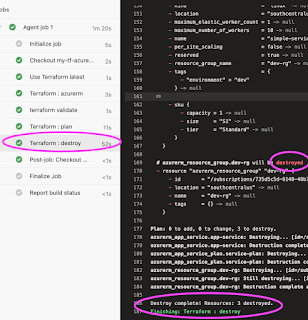
Check terraform.tfstate file after destroy.