Client Access Server Array Pre-Requisites
Two or more Exchange Server 2010 Client Access Servers can be configured as a CAS array using NLB as long they are not also installed as Mailbox servers that are members of a Database Availability Group (DAG).
The reason is that DAG members utilize Windows Failover Clustering, which can’t co-exist with NLB.
To demonstrate the setup of a CAS array the following servers have been provisioned.
Server #1
- Operating System: Windows Server 2008 64-bit R2
- Name: EX3.exchangeserverpro.local
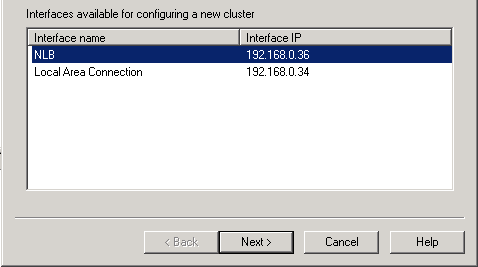
- Primary Interface: 192.168.0.34/24
- Secondary Interface: 192.168.0.36/24
Server #2
- Operating System: Windows Server 2008 64-bit R2
- Name: EX4.exchangeserverpro.local
- Primary Interface: 192.168.0.35/24
- Secondary Interface: 192.168.0.37/24
The IP address allocated to the NLB cluster will be 192.168.0.38.
Installing the Exchange Server 2010 Client Access Server Pre-Requisites
On each server, from an elevated Windows PowerShell prompt, run the following commands.
|
1
|
PS C:\> Import–Module ServerManager
|
Note: In my lab the servers are also Hub Transport servers, and so I installed both sets of pre-requisites. I also use the -Restart switch to automate the restart of the servers, however you can remove this if you wish to control when the servers are restarted.
For only the Client Access Server pre-requisites:
|
1
|
PS C:\> Add–WindowsFeature NET–Framework,RSAT–ADDS,Web–Server,Web–Basic–Auth,Web–Windows–Auth,Web–Metabase,Web–Net–Ext,Web–Lgcy–Mgmt–Console,WAS–Process–Model,RSAT–Web–Server,Web–ISAPI–Ext,Web–Digest–Auth,Web–Dyn–Compression,NET–HTTP–Activation,RPC–Over–HTTP–Proxy –Restart
|
For the Client Access Server and Hub Transport Server pre-requisites:
|
1
|
Add–WindowsFeature NET–Framework,RSAT–ADDS,Web–Server,Web–Basic–Auth,Web–Windows–Auth,Web–Metabase,Web–Net–Ext,Web–Lgcy–Mgmt–Console,WAS–Process–Model,RSAT–Web–Server,Web–ISAPI–Ext,Web–Digest–Auth,Web–Dyn–Compression,NET–HTTP–Activation,RPC–Over–HTTP–Proxy –Restart
|
After the servers are restarted run the following command, again from an elevated PowerShell window.
|
1
|
Set–Service NetTcpPortSharing –StartupType Automatic
|
Installing the Exchange Server 2010 Client Access Server Role
From an elevated command prompt run the following unattended setup command.
Note: Again, my lab servers are also Hub Transport servers.
For only the Client Access Server role with Management Tools:
|
1
|
C:adminExchange Server 2010> setup /m:install /r:ca,mt
|
For both the Client Access and Hub Transport Server roles with Management Tools:
|
1
|
C:adminExchange Server 2010> setup /m:install /r:ca,ht,mt
|
Installing Windows Network Load Balancing
On each of the servers, from an elevated PowerShell window run the following commands.
|
1
|
PS C:\> Import–Module servermanager
|
|
1
|
PS C:\> Add–WindowsFeature NLB
|
Creating the NLB Cluster
After both servers have been prepared the NLB cluster can be created. On the first server launch the Network Load Balancing Manager from Administrative Tools.
From the Cluster menu choose New.
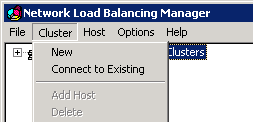
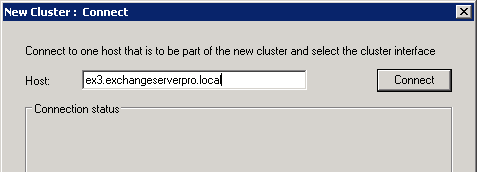
Connect to the first server for the NLB cluster.
Choose the interface that is to be used for the cluster, and then click Next.
Accept the default Host parameters and click Next.

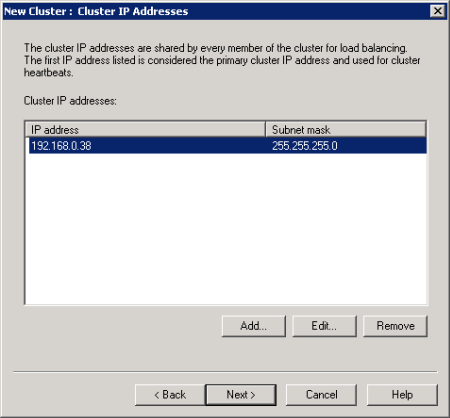
Click Add and enter an IPv4 address for the NLB cluster, then click OK.
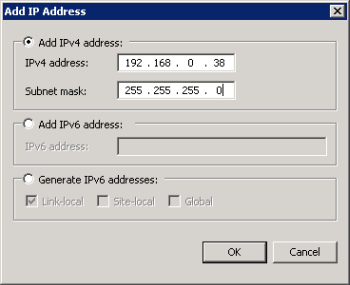
Click Next to continue.
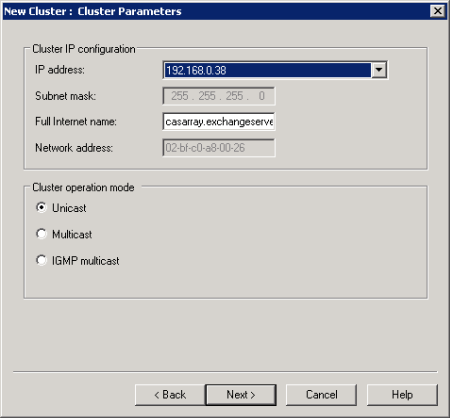
Enter a name for the cluster. In this example I’m using casarray.exchangeserverpro.local. Click Next to continue.
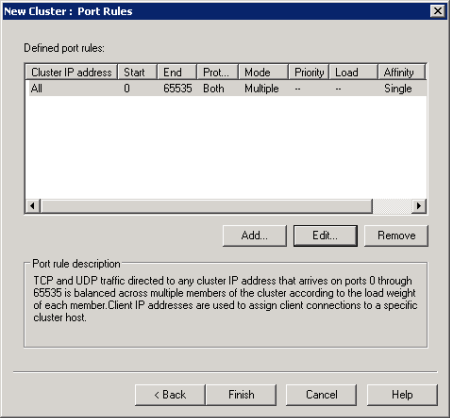
Although the port rules can be made more specific, in this example the default rule is acceptable. Click Finish to complete the creation of the NLB cluster.
At this stage you should have a single host NLB cluster that is successfully converged.

Right-click the cluster name and choose Add Host to Cluster.
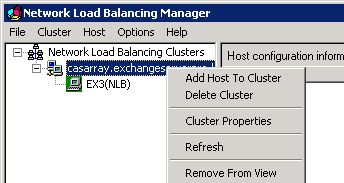
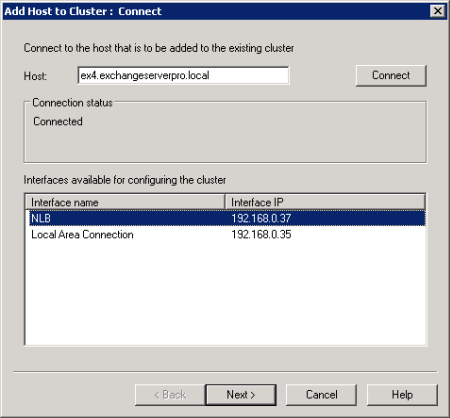
Enter the name of the second server and click Connect. Choose the interface to be used for the cluster and click Next.
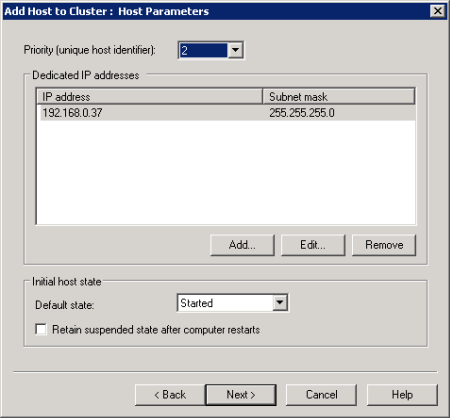
Accept the default Host Parameters and click Next.
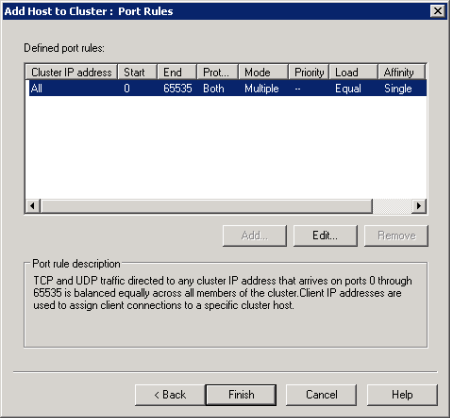
There are no changed necessary to the port rules, so click Finish.
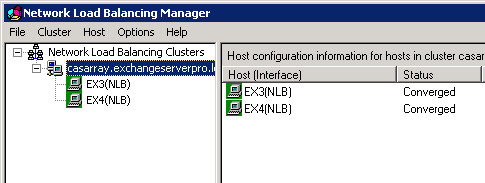
You should now have a dual host NLB cluster that is successfully converged.
One final step, on each of the NLB members run the following command to allow the NLB virtual IP address to be reachable from outside of the subnet that it resides in.
|
1
|
netsh interface ipv4 set int “NLB” forwarding=enabled
|
Replance “NLB” with the name of your NLB interface on your server.
Creating the Client Access Server Array
Now that the NLB cluster has been formed we can create the CAS array in Exchange Server 2010.
First, register a DNS record for the NLB cluster name.
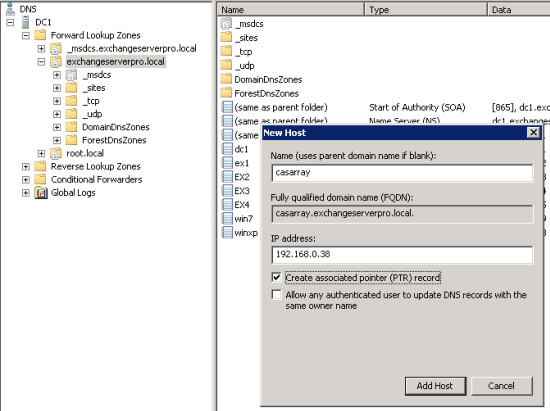
Next, launch the Exchange Management Shell on one of the Exchange servers and run the following command.
|
1
2
3
4
5
|
[PS] C:\>New–ClientAccessArray –Name CASArray –Site “Default-First-Site-Name” –Fqdn casarray.exchangeserverpro.local
Name Site Fqdn Members
—— —— —— ———–
CASArray Default–First–Sit... casarray.exchangeserverpro.... {EX3, EX4}
|
Substitute the Name, Site, and FQDN as appropriate for your environment.
Updating Existing Mailbox Databases
When the CAS array has been established any new mailbox databases created on servers in that Active Directory Site will be configured with the CAS array as their RpcClientAccessServer.
However any existing mailbox databases need to be manually updates so that those mailbox users begin connecting to the new CAS array.
You can see here that the existing mailbox database on server EX2 is still configured with a standalone Client Access server as its RpcClientAccessServer.
|
1
2
3
4
|
[PS] C:\>Get–MailboxDatabase –Server EX2 | fl name, rpc*
Name : Mailbox Database 02
RpcClientAccessServer : EX3.exchangeserverpro.local
|
To update all databases on the server with the new RpcClientAccessServer run the following command.
|
1
|
[PS] C:\>Get–MailboxDatabase –Server EX2 | Set–MailboxDatabase –RpcClientAccessServer casarray.exchangeserverpro.local
|
The change can be seen by running the same command as earlier.
|
1
2
3
4
|
[PS] C:\>Get–MailboxDatabase –Server EX2 | fl name, rpc*
Name : Mailbox Database 02
RpcClientAccessServer : casarray.exchangeserverpro.local
|
Note that any existing Outlook profiles will not automatically update from the single Client Access Server to the new CAS array name. Those clients will not automatically failover to an alternate member of the CAS array when there is a server failure. You will need to update those profiles for them to receive the high availability benefits of the CAS array. This is one reason that it is important to establish CAS arrays prior to migrating user mailboxes to Exchange Server 2010.
