Remote access role is a VPN which protects the network connection or your remote connection from one side to another and protecting both sides from attacks or data sniffing as VPN protocol uses a tunnel inside of a standard data connection.
Note: You’ll need to open a TCP port 1723 on your firewall as this port is used for the VPN access.
Also, I’d like to point out that this might not be a guide for enterprise deployment as there you’ll perhaps use a hardware VPN from your router or use a Direct Access feature which however relies on Internet Protocol version six (IPv6) technologies to establish client connections.
How to install VPN on Windows Server 2016 – The steps:
Install a Remote access role via the Add Roles and Features Wizard. Open Server Manager either locally on the server that will host the remote access role or on a computer that has Server Manager configured to connect to the server you’re deploying the role.
Then select Add Roles and Features Wizard from the Manage Menu. Click next on the before you begin page if it is displayed. Then select Role-Based or Feature-Based installation and click next.
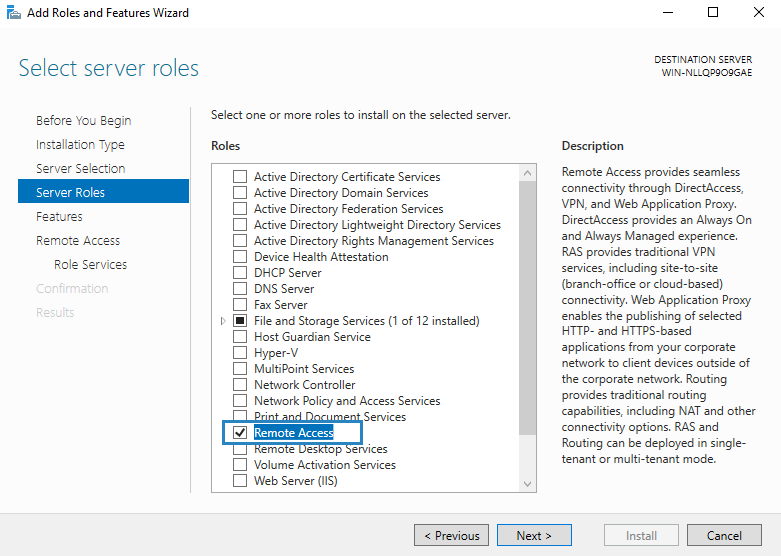
On the Select Server Role page, scroll down and then select check box Remote Access. And then click next.
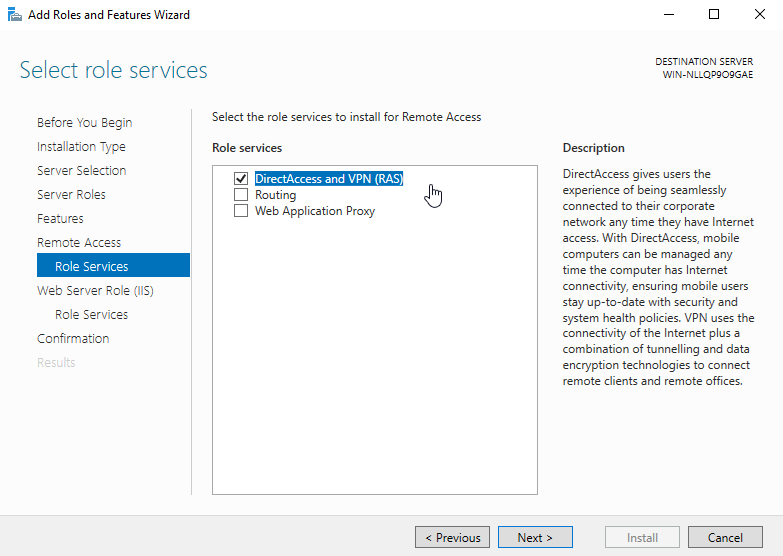
You’ll need to click two more times to get to the Remote access Role Services, where you’ll have to select Direct Access and VPN.
Accept the installation of sub-components, such as IIS… Accept all the defaults.
It will take some time to finish the installation of all components and sub-components.
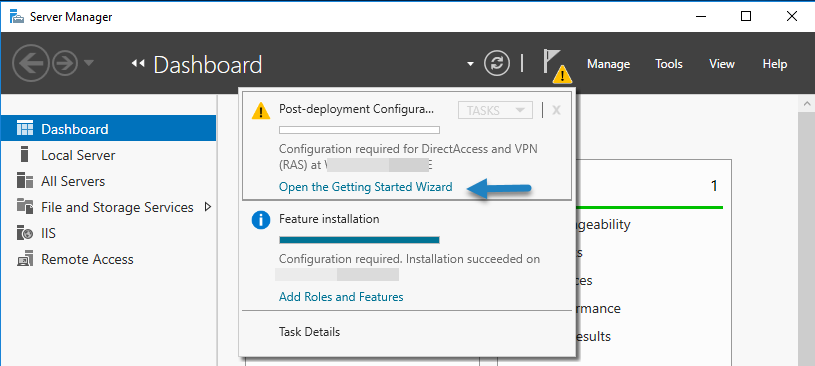
Then click on the link Open the Getting Started Wizard to open the configuration wizard.
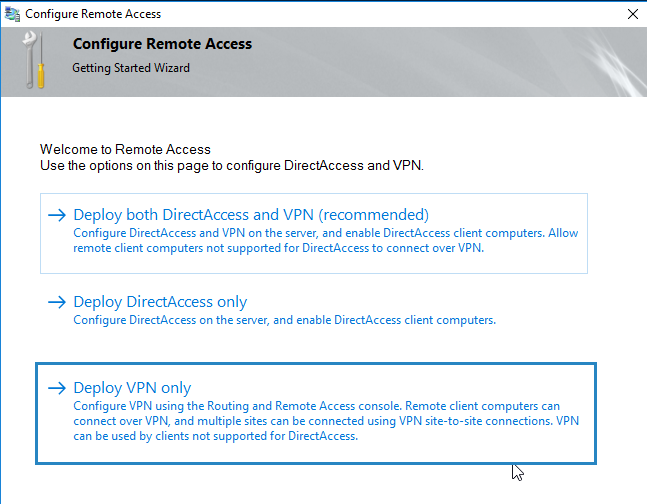
A new window will appear. You’ll need to click Deploy VPN only which will configure VPN by using the Routing and Remote Access console.
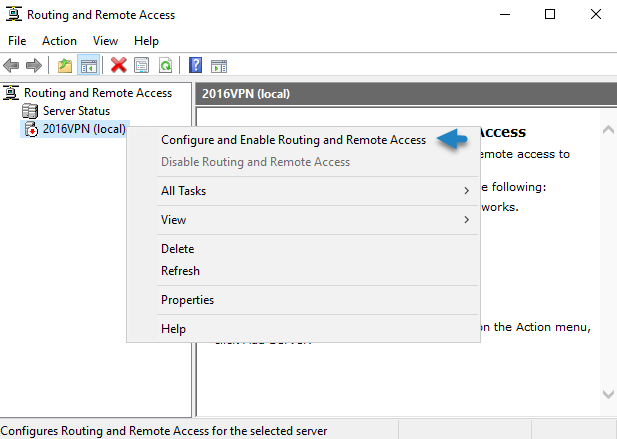
After you click on that part, you’ll open the Routing and Remote Access console. Right click on the Server name and click on Configure and Enable Routing and Remote Access.
Note: You can also launch this console via Control Panel > System and Security > Administrative tools.
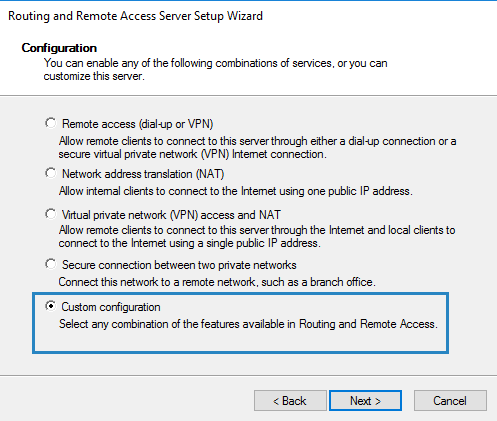
Click Next and Select Custom Configuration.
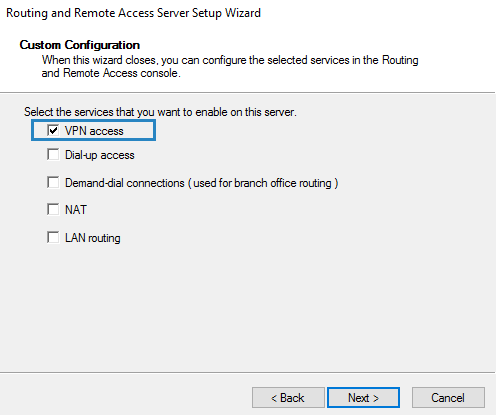
So far, it’s been very simple. Let’s go and finish the configuration. All we need to do on the next screen is to tick the checkbox VPN access as we only want this feature to be active.
You’ll then have only one page which displays the summary of your selections. Confirm by clicking the Finish button. After few seconds, you’ll see a pop-up window asking you to start the Routing and Remote Access service. Click on Start Service button.
Next Step – Allow some users to connect to your newly configured VPN server
Usually this kind of small environment can be used for system administrators requiring access to remotely installed server, or for a small group of users within an organization. Depending on the architecture, the server can be part of a Microsoft Domain and have a central management of users through an Active Directory (AD) or it can be a standalone server which is just outside of any domain.
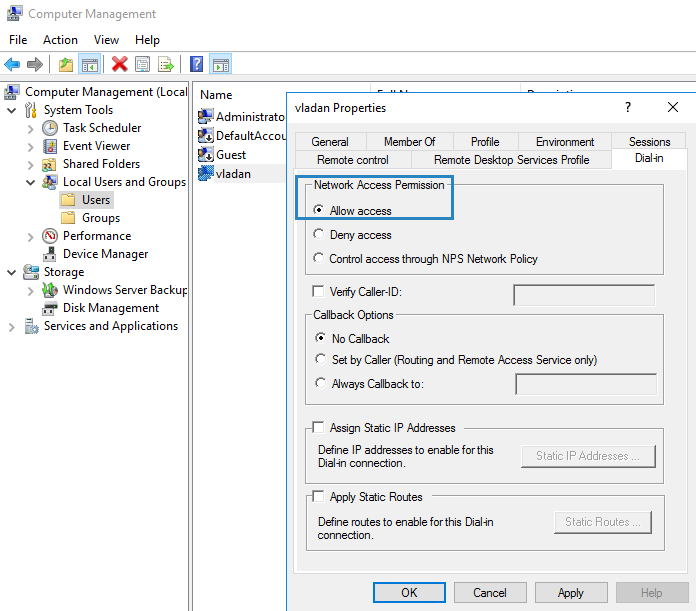
For the sake of simplicity, we consider this case, but in both cases, you’ll need to configure at least one user to access through the VPN and we’ll show you how.
So if you’re in “Workgroup” environment you can use a Computer Management Console (MMC), and if you’re in a domain environment this can be done in the user properties of an Active Directory user.
Usually, there is a DHCP server within a company environment. If that’s not the case, you’ll have to add a static address pool.
You can find the settings in the properties of your VPN server, where you can click on the IPv4 tab and enable and configure the Static address pool. Make sure to use the same subnet as your static address of your server.
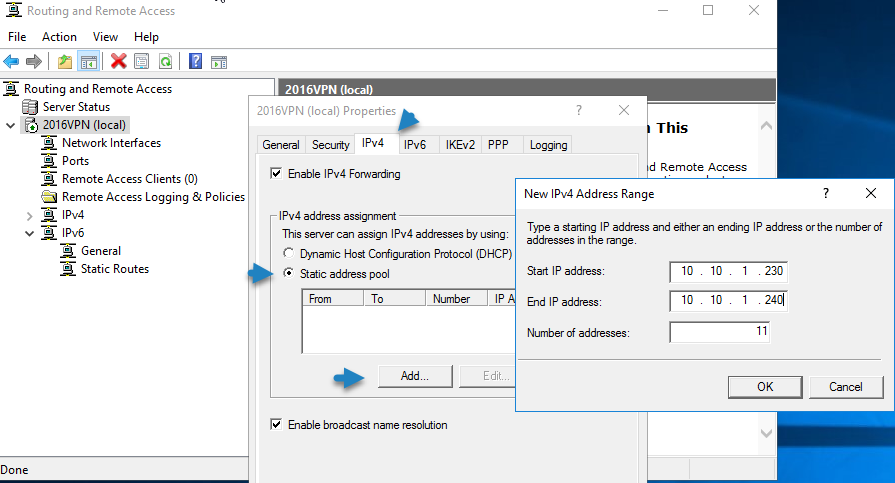
Well, this is about.
From the client’s perspective. The client has to configure a VPN connection from the client’s end. So, depending on the Operating system the client is using, the setup might differ.
But basically, you’ll should set up new VPN connection.

And then
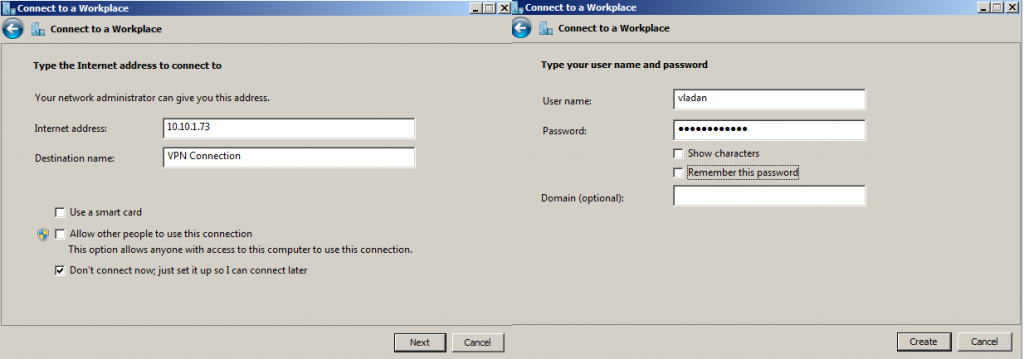
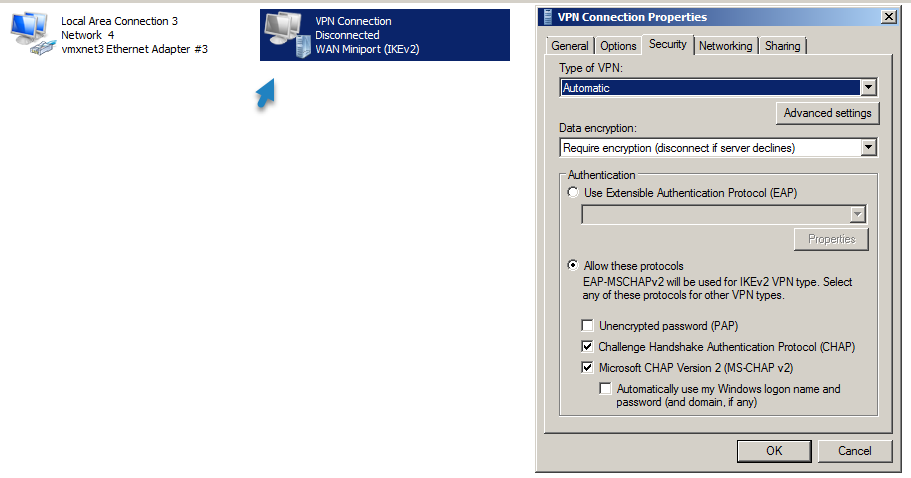
This will create a new connection within the network connection window there.
To finally get this screen after connecting and entering your password.
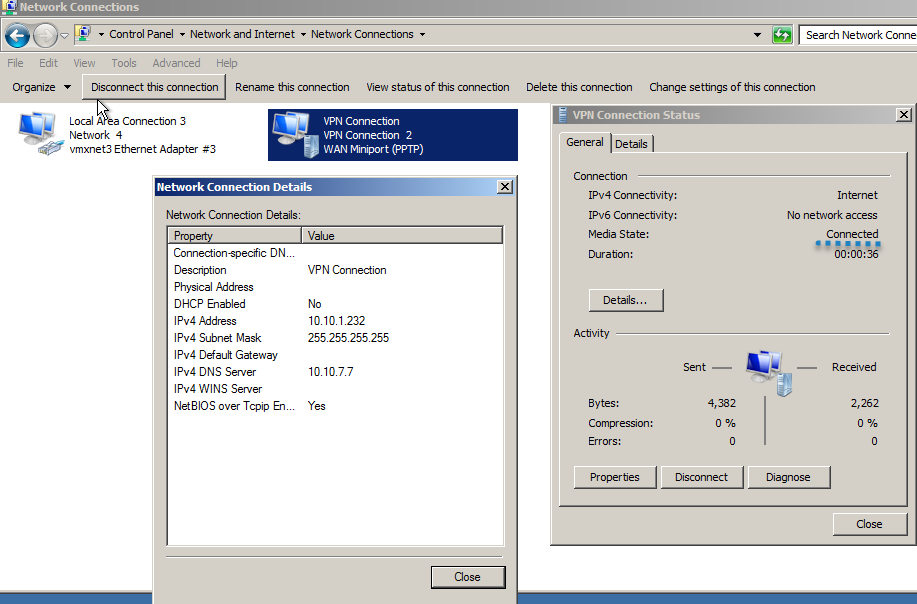
Wrap up:
This is the simplest way of doing it. It involves, however, opening the TCP 1723 port on the firewall. Note that another solution of remote access exists, but they usually involve installation of third party tools on the server side, and also on the client side.
You may want to avoid installing those tools on company servers and stick to traditional Built-in VPN from Microsoft, for remote administration.
