
After the WSUS installation has been completed on Windows Server 2016, you are ready to configure the initial WSUS settings. This is a necessary step that you can not skip so that WSUS can be active.
Depending on the infrastructure, you may need some further action on your part to ensure WSUS server communication with clients with the upstream server (eg Microsoft Update).
For example, if there is a firewall between the WSUS server and the Internet, then they will need to be able to communicate with each other in order to check and get updates.
So, let’s move on to the initial WSUS settings using the Configuration Wizard.
WSUS 2016 Initial Configuration Settings
If you installed the role through Server Manager and kept the installation wizard window open, you can open the initial settings window by clicking Launch Post-Installation tasks as shown in the figure.
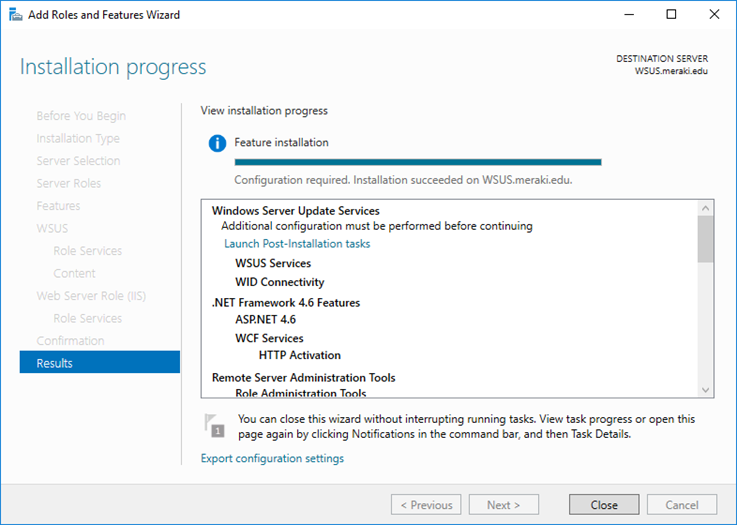
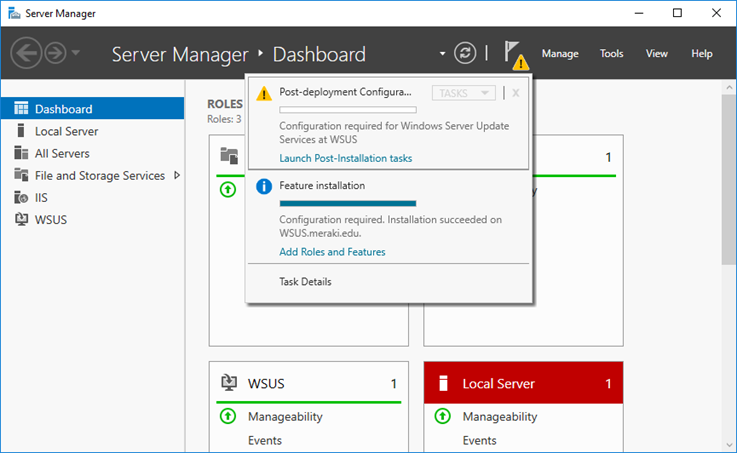
Alternatively, Server Manager alerts will display the corresponding message from where you can open the same window.
In the window that appears, tick Store updates locally, select the folder where the updates will be stored, and click the Run button to continue.

The Configuration Wizard for WSUS Server will open, where you will need to choose which updates WSUS will receive, which languages, the timing of synchronization, etc. Of course, all settings can be changed at any time based on your needs.
In the Before You Begin section, simply click Next to continue.

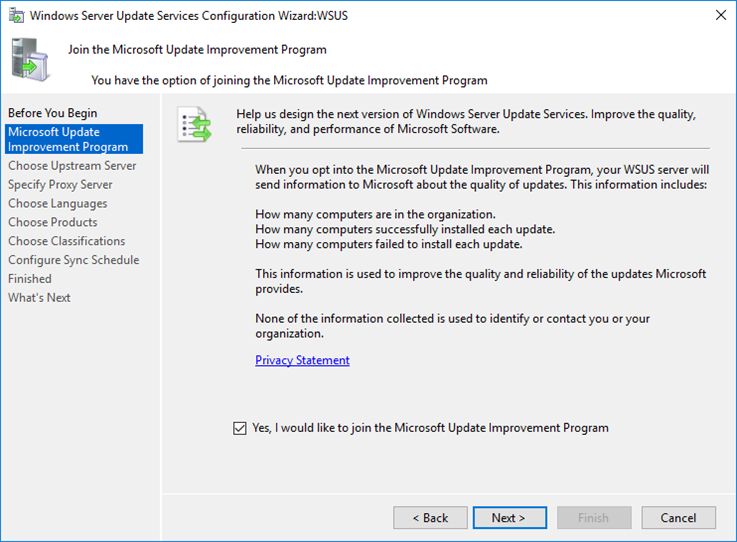
In the Microsoft Update Improvement Program section, select whether to participate in the Microsoft program by choosing the appropriate option and then click Next to continue.
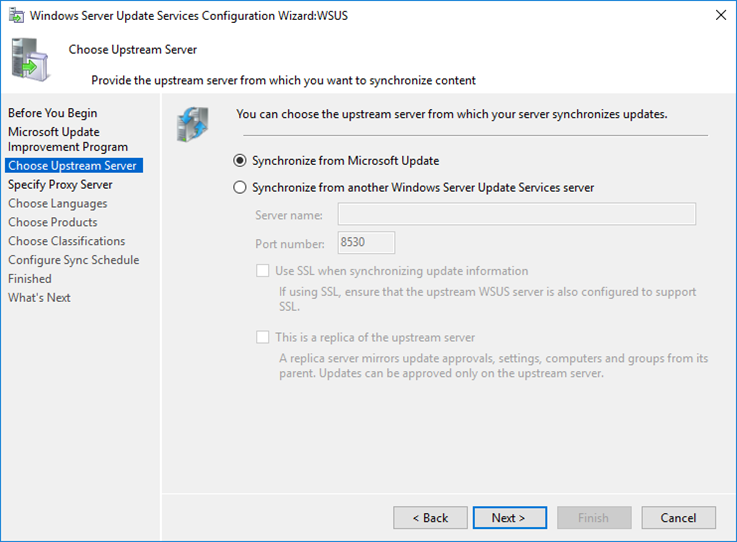
In the Choose Upstream Server section, select which server will synchronize the WSUS server. If it is your first WSUS server then select Synchronize from Microsoft Update. If WSUS acts as a replica server then select Synchronize from another Windows Server Update Services server and fill in the necessary information for successful connection to each other. Click Next to continue.
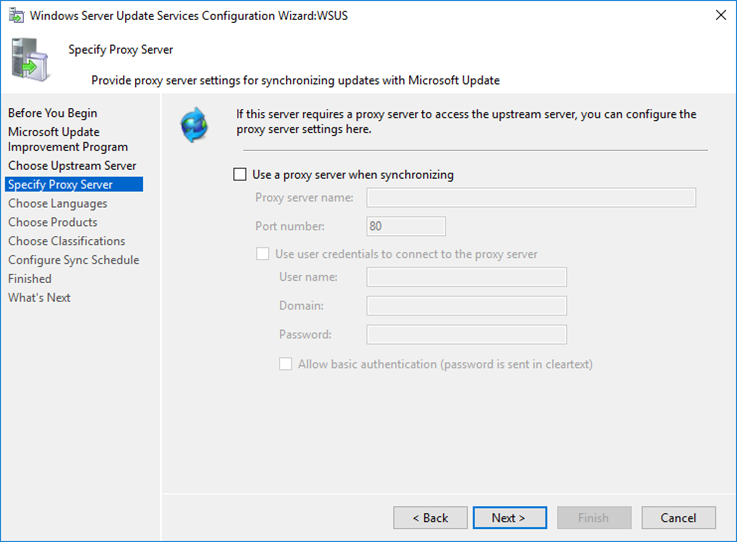
In the Specify Proxy Server section, fill in the corresponding fields as long as you are using a proxy server on your infrastructure, otherwise simply bypass this step by clicking Next to continue.
Based on the settings you selected in the previous two steps, you will be prompted to make a connection to the upstream server to save the settings. Click on the Start Connecting button and wait until the process completes, which may take several minutes.

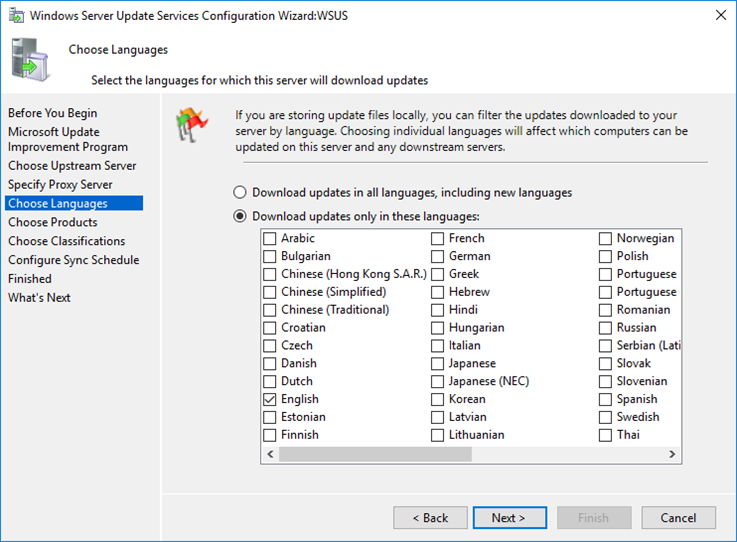
In the Choose Languages section, enable Download update only in these languages and select only the languages you use on your infrastructure. For example, if you have a mix of Windows versions in Greek and English, select only Greek and English. Click Next to continue.
In the Choose Products section, first browse the entire list and select only the products you use on your infrastructure and you want to receive all available updates. If you do it for the first time, it would be best to select only a few products and then familiarize yourself with the WSUS environment to add even more products. Click Next to continue.

In the Choose Classifications section, select only the update categories you are interested in depending on the products you selected in the previous step. Of course, check these with caution. For example, I would not activate the Drivers option because the result would be tens or hundreds of GB updates that 99% of these would not be used on the infrastructure.

In the Configure Sync Schedule section, select whether synchronization to check for new updates will be done manually or automatically according to the schedule you set. Obviously, it is advisable to do so automatically when the infrastructure is not running in full engines, such as the after hours when employees are not working.

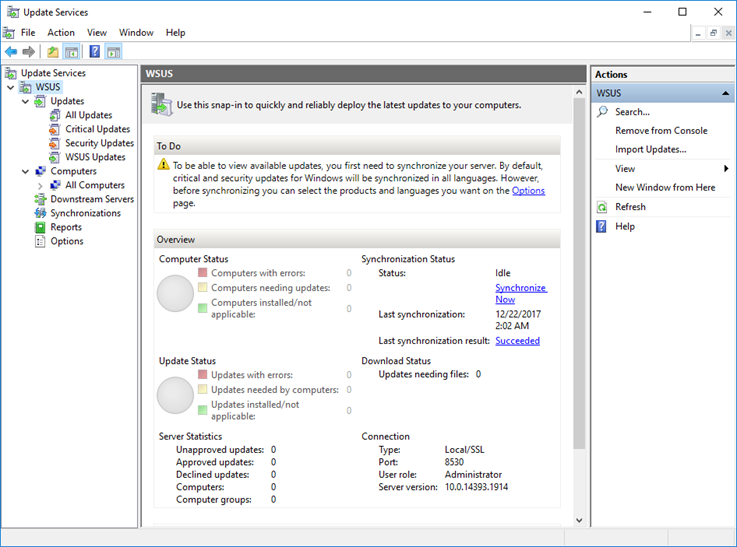
In the Finished section, the configuration process of the original WSUS server settings has been completed. What’s left now is to make the initial synchronization to detect all available updates from the upstream server (eg Microsoft Update) and then start downloading them. By selecting Begin initial synchronization and clicking Finish this will be done immediately.

However, you can skip this step for the time being, and schedule the synchronization to a more ‘free’ time as the network will be tasked with receiving tens of GB of updates. You can also start the original synchronization manually through the WSUS management console.
The duration of the initial synchronization can take from a few minutes to several hours. This depends directly on the number of products and categories you chose in the previous steps.