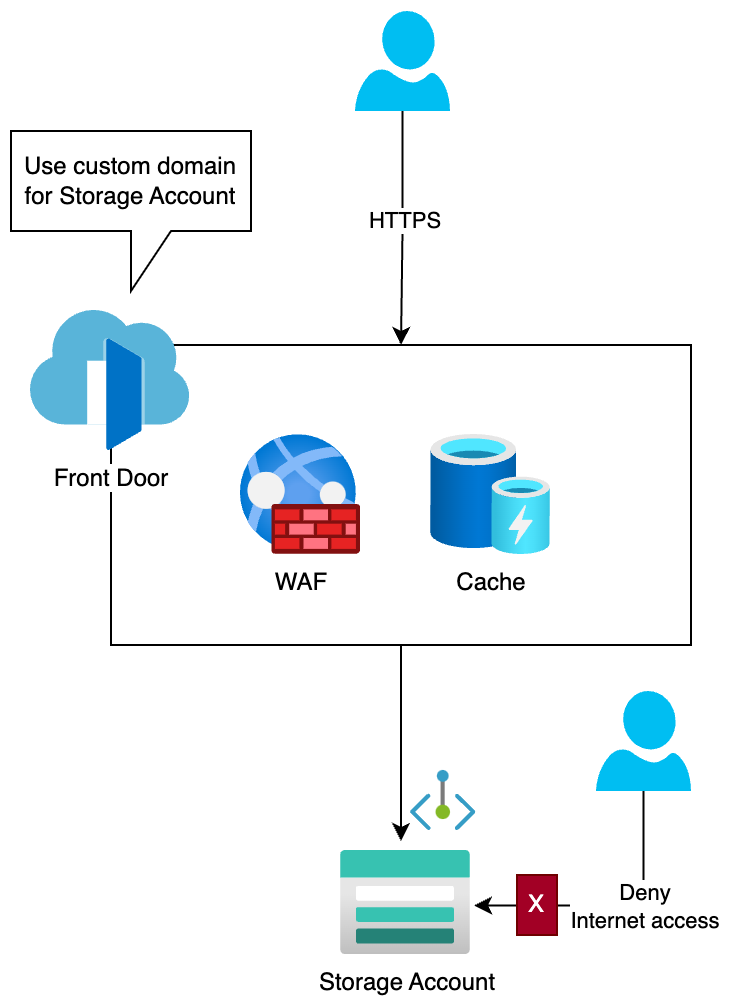
This service is a global load balancer for HTTP/HTTPS traffic. You don’t need to manage resiliency, as this service is resilient by default. See what feature you can enable, using this approach:
- Reach Azure Storage Account using a custom domain, with HTTPS. This is not possible with the Storage Account itself.
- Use caching to make your answer quicker, irrespective of the origin of the request. Thanks to the point of presence (PoP) function of Azure Front Door.
- Disable direct connection to the Azure Storage Account.
- Use Microsft backbone network, for communication between Front Door and Storage Account.
All these features can be helpful in the following scenarios:
- Delivering images, CSS files, and JavaScript files for a web application.
- Serving files and documents, such as PDF files or JSON files.
- Delivering non-streaming video.
This method will result in the architecture shown below:
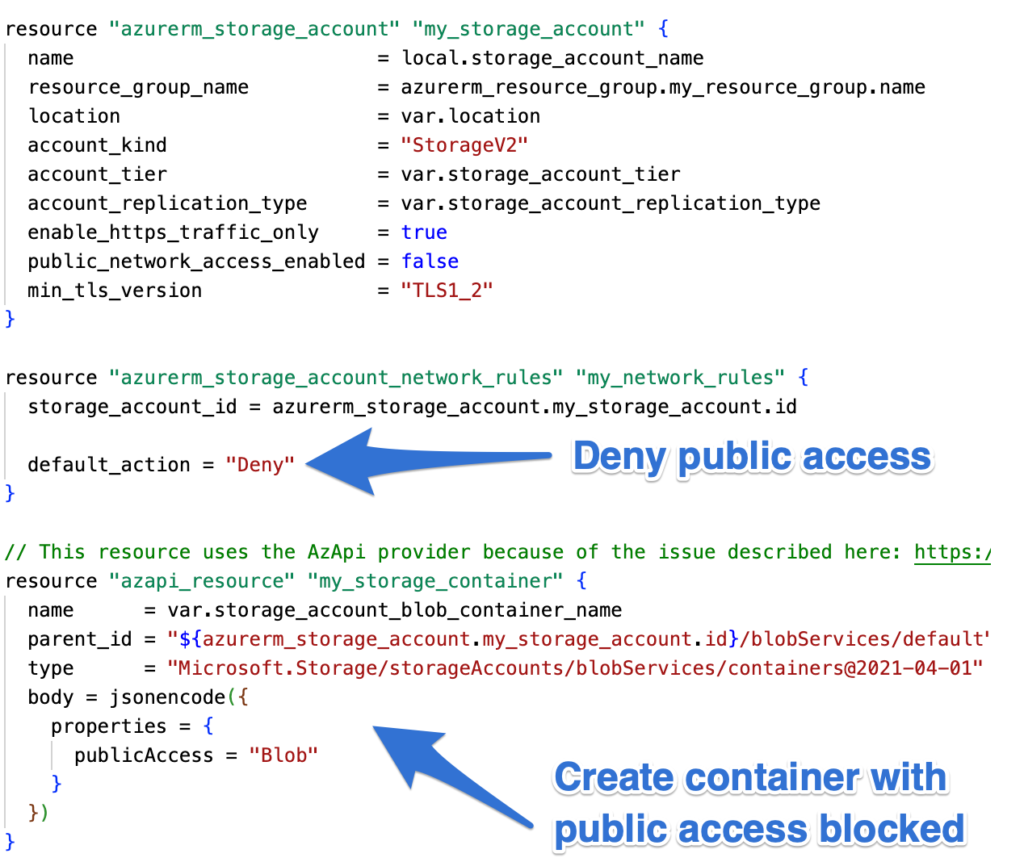
The following concern is how to set it. Naturally, Terraform is my preferred IaC. Create a storage account first.
As the Storage Account is defined, Azure Front Door is next in the queue, we need below Terraform resources:
- azurerm_cdn_frontdoor_profile
- azurerm_cdn_frontdoor_endpoint
- azurerm_cdn_frontdoor_origin_group
- azurerm_cdn_frontdoor_route
- azurerm_cdn_frontdoor_custom_domain
- azurerm_cdn_frontdoor_firewall_policy
- azurerm_cdn_frontdoor_security_policy
As creating Azure Front Door is really easy, I will jump into Azure Storage Account & Front Door configuration.
First, join the Front Door group to our storage account. For instructions, see below.
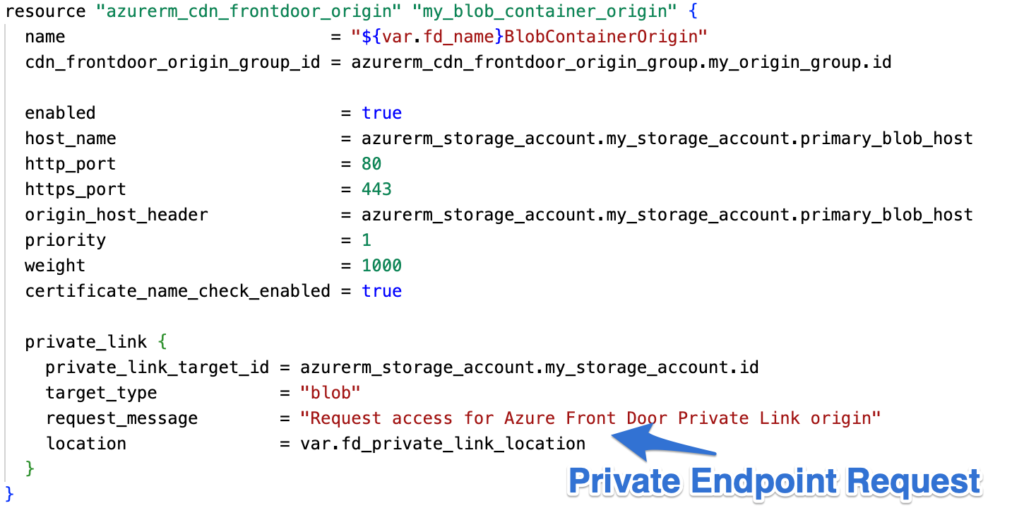
You should take note that there is no Private DNS zone or Private IP selection here, nor do you build a Private Endpoint. This is basically a request to create a Private Endpoint. You will be shown how to approve this request in the Storage Account later on. The creation of the route comes next:
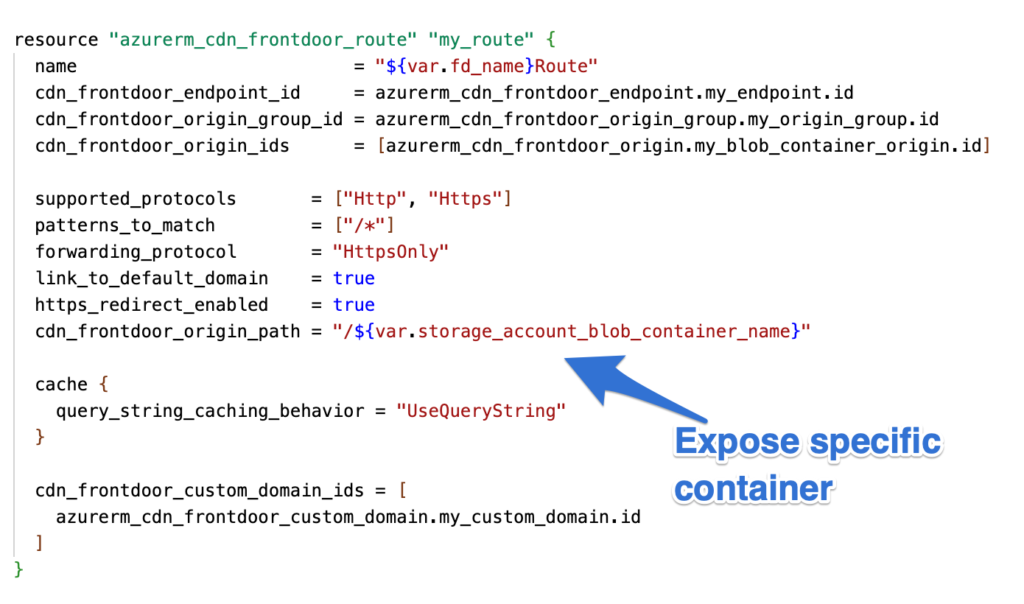
Notice, that only one container is exposed here. Other paths of the Storage Account, remain private.
The Terraform sources have all parameters with default values, so you only need to, authorize in Azure and run apply Terraform scripts:
If you run this terraform locally then remember to set credentials. I use Service Principal, script for creation:
az ad sp create-for-rbac --name api://terraformspn --role Contributor --scopes /subscriptions/##SUBSCRIPTION_ID##Then set environment variables in your console, I use zsh so for me it will be:
export ARM_CLIENT_ID="##appId##"
export ARM_CLIENT_SECRET="##password##"
export ARM_TENANT_ID="##tenant##"
export ARM_SUBSCRIPTION_ID="##subscription##"
After setting environment variables, run commands (separately).
terraform init
terraform apply -auto-approve
You ought to have all the resources produced once execution is complete. The final step is to accept Private Endpoint. Go to the newly established resource group -> Storage Account -> Networking -> Private endpoint connections to accomplish this. Click Approve after selecting the Private endpoint.

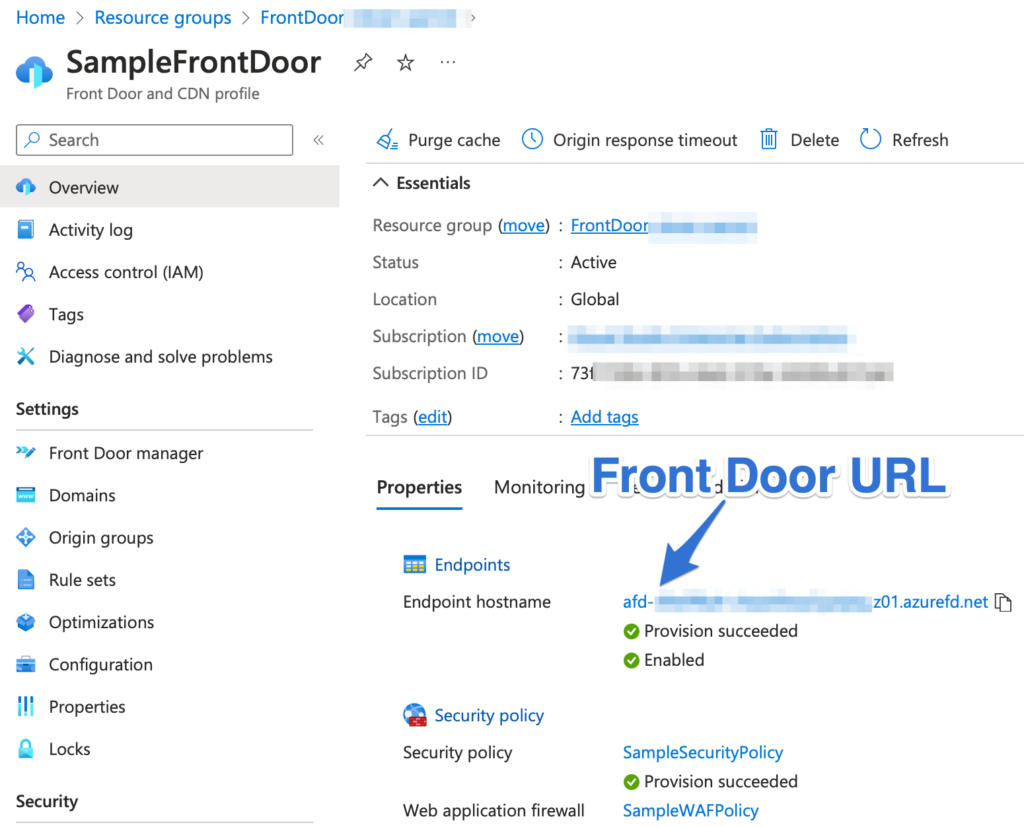
You ought to be able to use Azure Front Door to access the Storage Account after Private endpoint acceptance. Select URL after navigating to the Front Door instance. Following that, enter the file name and exposed container name (the default is mycontainer). There, you may pick your Front Door URL:
Hope you got something out of this demo.
